Creating Searches
Building a New Search
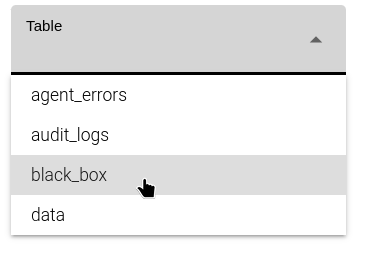
Selecting a table
The first step for creating a new search is selecting the table containing the data you wish to query. Multi-table searches are not currently supported in the Ardexa Cloud.
Table Availability
All of the following conditions must be met for a table to be available for selection in the [Tables]list:
the table must already exist, and be populated with data
the user must have the necessary permissions to view the desired table, as explained here.
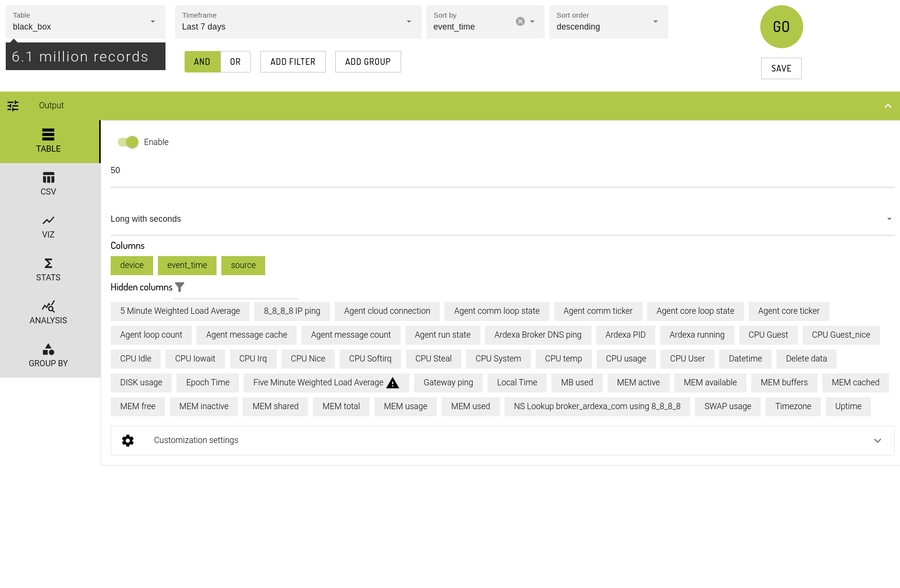
After selecting a table, the app will populate the rest of the Search view, enabling you to run queries and view results.
Total Available Records
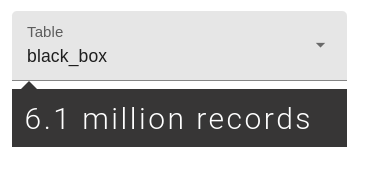
When you first select a table, the total number of records in the table are immediately displayed in the upper-left corner of the view.
If you change your search options, you will need to press [GO] to update the results section. A refresh icon will be displayed at the top of the search results to indicate this:
Building your Search - Inputs
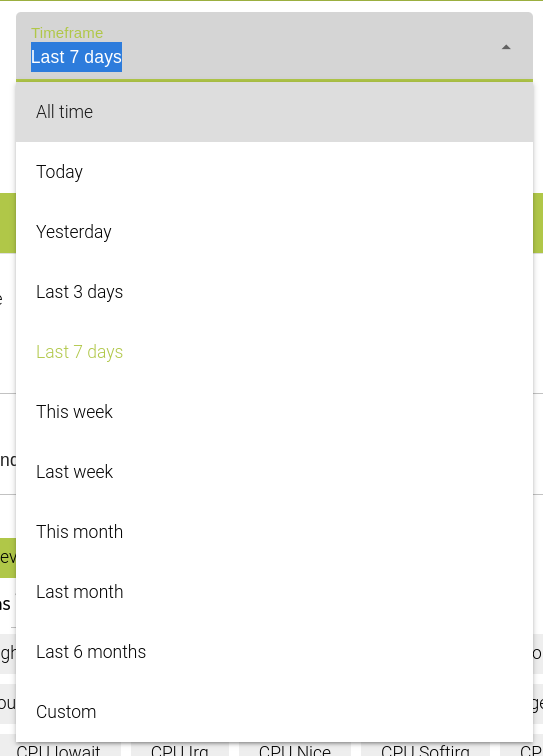
Common time-frames
A search time-frame is period from which you would like the data to be retrieved from the selected table.
Common timeframes are a list of preset periods that are provided by the Ardexa Web App to you for easy selection.
As an example, Last 7 days may translate to:
The [Common timeframes] field offers the custom value at the end of the drop-down selection list. A custom value allows you to set a specific time-frame including hours and minutes. Custom values are not relative to your present time, i.e. they are fixed.
Hint: if you wish to review the literal translation of a pre-set Ardexa [Common timeframe], then do the following:
Select a pre-set Common timeframe value from the list, eg,
this monththen,Select the value
customafter your initial selection; the literal timeframe translations will now appear in the view.
Note: custom time frames - vs -Common timeframes
custom time frames - vs -Common timeframesHowever, keeping the selected value as custom will maintain the literal values against the search should you ever decide to save the search.
This is important when you come to retrieve a saved search, as you will be supplied the literal time frames from the past if the value of Common timeframe is kept ascustom.
Hence, the pre-set, relative Common timeframe will not be applied if it is saved with a value of custom. More on the behaviour of custom selection and saved searches below.
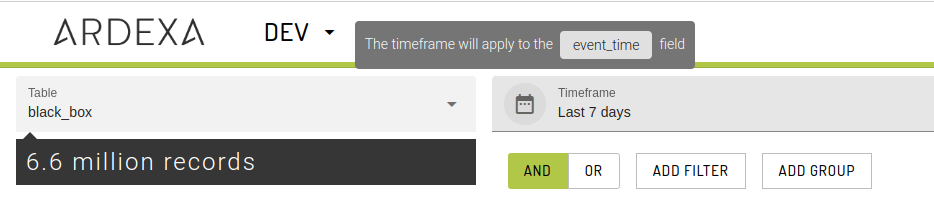
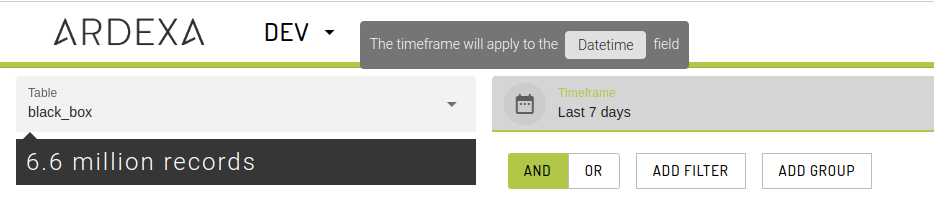
Date field
By default, the timeframe will use the built-in event_time field when applying the filter. This may not always be desirable, such as uploading historical data from a database. To change the date field used when applying the Timeframe, simply click the icon on the left of the timeframe box and select the alternate field you wish to use.
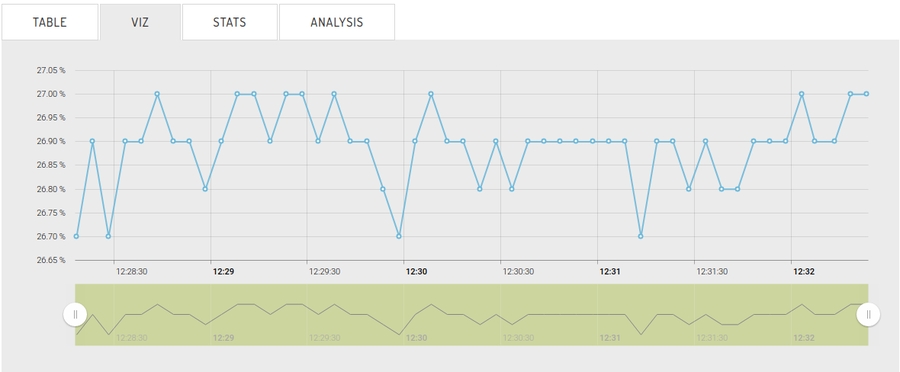
Concept: Time Zones
All searches are conducted using your local time wherever that may be.
Example; you might move time zones, log into the Ardexa Web App and then run a saved search. The search will be conducted using your new time zone and the data retrieved are likely to be different had you been in your old time zone.
Example; two different people in your team run the same 'today' search from different time zones, at-the-very-same-time; then the concept of today would apply locally and the data retrieved for each person would likely be different. Essentially, the period defined for, what is today for me in one timezone is different for what is today for you in another timezone.
The following demonstrates a today query taken at the same time from different time zones against the same data:
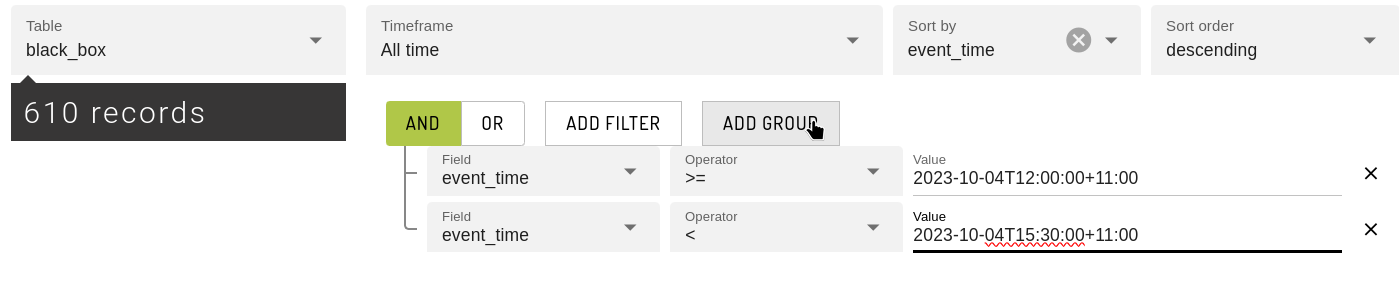
If you need exact control over the timeframe and/or time zone used in a search, select a timeframe of All Time and add one or more filters on a date/time field in your search. These filters accept ISO-8601 timestamps, for example:
Filters
Search filters allow you to selectively determine which records to retrieve from your table by applying custom rules as filters. Filters are used to include or exclude data from being returned in your search. They can be simple or very complex.
A filter is not necessary to run a search; at it's most basic, without a filter, a search will return all records in the table.
[AND] / [OR]buttons
These buttons define how the filter rule operate in relation to the surrounding rules that you may create. For example, if you were to create two filter rules, the AND/OR will operate as:
ANDboth rules operate on the data, and both rule conditions must match for the row to be returned/included in the search results.ORboth rules operate on the data, and if either condition of the rule matches the data then the row is returned/included in the search results.
[ADD FILTER]
Adds a further filter entry for you to complete.
Each filter rule is applied to your search when the search is executed.
Filter rules can be nested using the
[ADD GROUP].
[ADD GROUP]
For grouping and nesting collections of filters.
Separated and related to other rules by using of
[AND]/[OR]
Filter Fields
(table field)(1st field in the filter rule)
Choose the table field you would like to apply your filter rule.
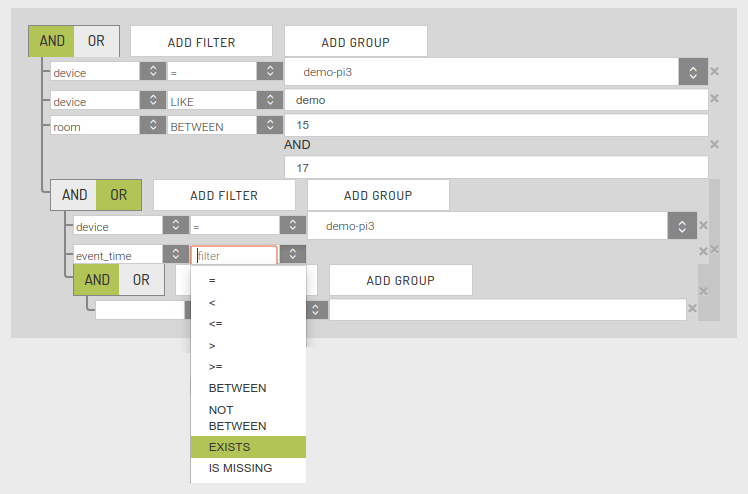
condition operator(2nd field in the filter rule)
The operator upon which the filter rule is based eg:
=,<=.
conditional value(2nd field in the filter rule)
The test value upon which the filter rule is based.
Some table fields will resolve and offer pre-defined values, others will require text, numeric or date values to be entered
Run the Search
Building your Search - Outputs
Search Outputs help define how a search will appear. Changing these values may still require the search to be re-run for the changes to appear.
Enable TABLE for your Search
Select the [TABLE] tab and enable tabled data via the Enable checkbox. This allows you to view your tabulated search results.
Rows
Limit how many rows from the search results are added to the CSV.
Date format
Choose the date format to be applied to the
EVENT_TIMEfield. The search will need to be re-run for the changes to take affect.
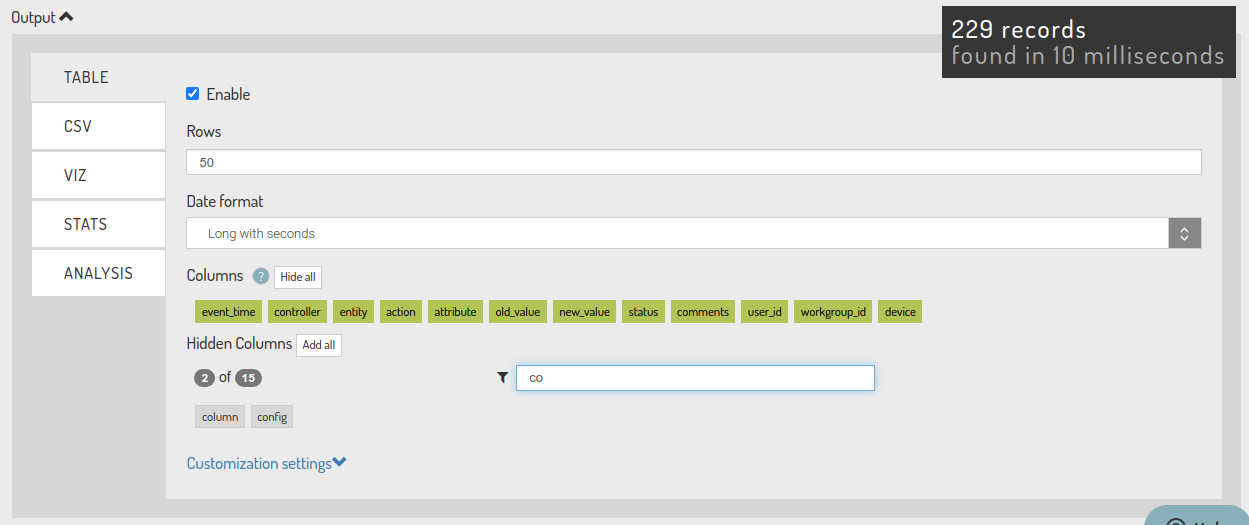
Columns
Independent of your table columns, choose which of your search result columns are to be included in the
TABLEof data.Drag your desired fields to-and-from the
Hidden Columnslist, or click on the[Add all]/[Hide all]buttons to add/remove all fields. These changes will be applied in real-time to your tabulated data.
Filtering Hidden Columns
The searches view also displays the total number of Hidden Columns , a filter box and the ability to reduce the Hidden Column to a smaller more manageable subset.
If your list of columns exceed a certain limit, the [show more] / [show less] toggles will be displayed.
Customization Settings
Provided through the customization extension, you have the ability to apply some specialised features to assist in building your searches. These include:
Only show duplicate records
Only show duplicate records Force your search to only return duplicated records. Handy for problem data analysis.
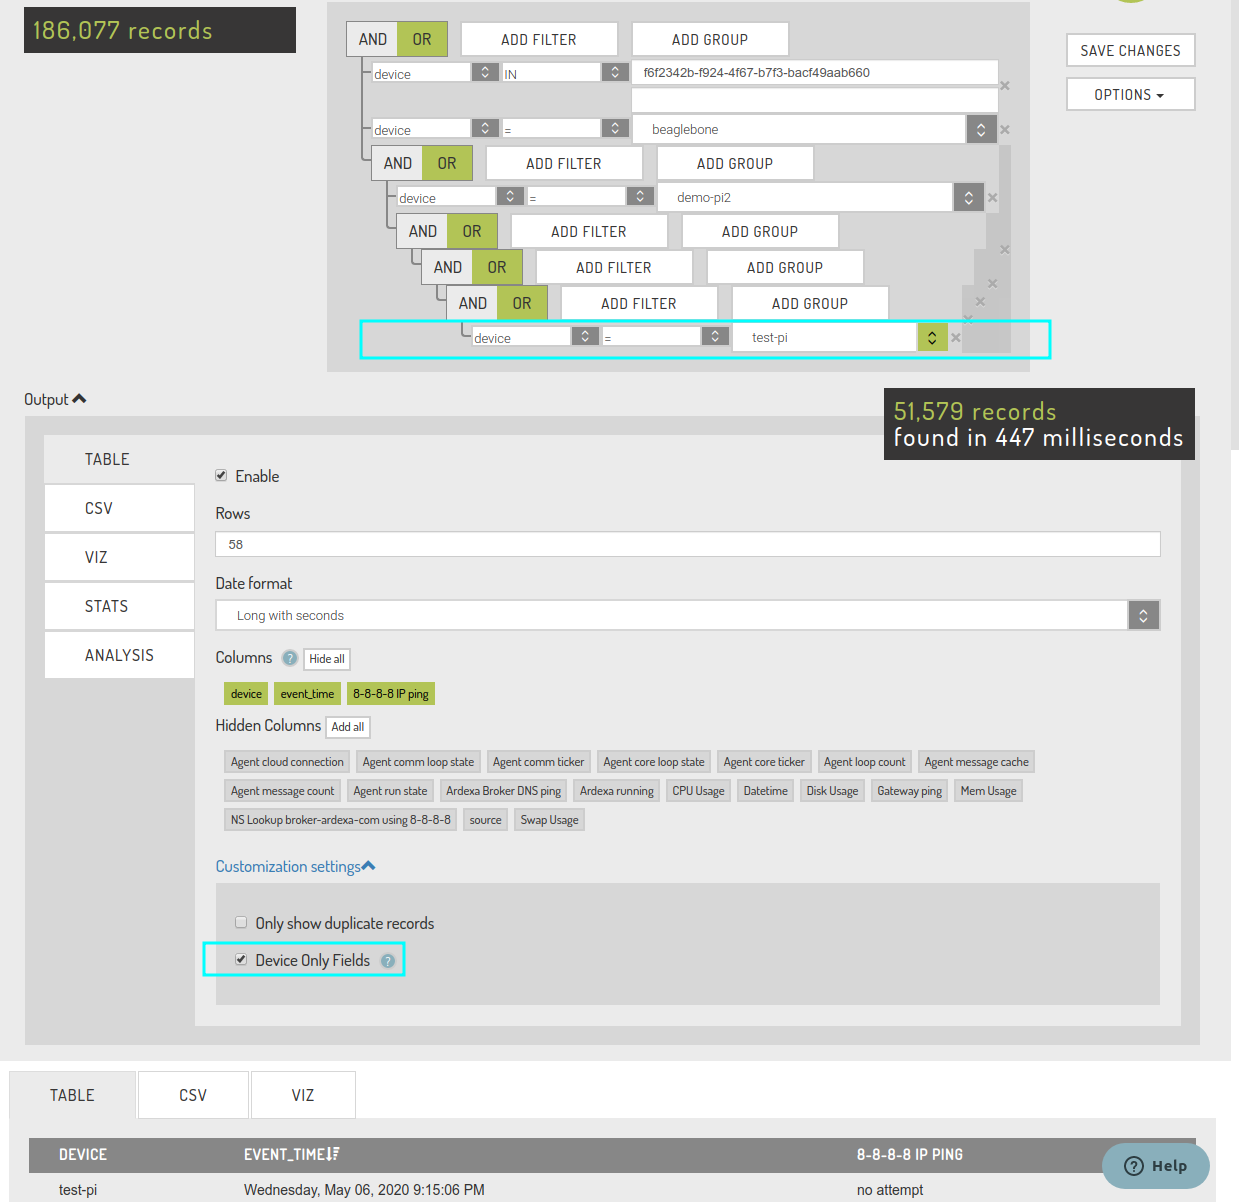
Device Only Fields
Device Only FieldsA single search table may potentially be populated by many devices and their sources. This scenario will result in many data columns in your search tables, with some of these columns not being relevant to other devices. Yet, at times you may only be interested in viewing data and columns populated by a particular device or devices.
You can use this switch in your SEARCHES to limit the display columns to only those columns of devices mentioned in your search filters (devices that populate those columns)
This switch will remove all columns for display that are not associated to a device mentioned in your search's search filters.
This allows you to focus on columns that are sourced from specific device' fields. A handy tool when a given table is sourced from a multitude of devices. In this scenario, fields on other devices also populate columns to the same table under search, however they are not relevant to you in your current search parameters, in which case the
Device Only Fieldsswitch can assist you.When activated, columns displayed are reduced where a search filter of
deviceand it'svalueare provided in your search filters.Filters using the operators
INLIKEand=are evaluated.
Example - Using the Device Only Fields Switch.
Consider the following example where we have a complex nesting of search filters using various devices in the workgroup.
The columns in this table
agent-black-boxare sourced from the devicetest-pi
To restrict table columns to those fields only sourced from test-pi we would need to do the following:
Include the device in a search filter (any filter)
Check the box
Device Only Fields
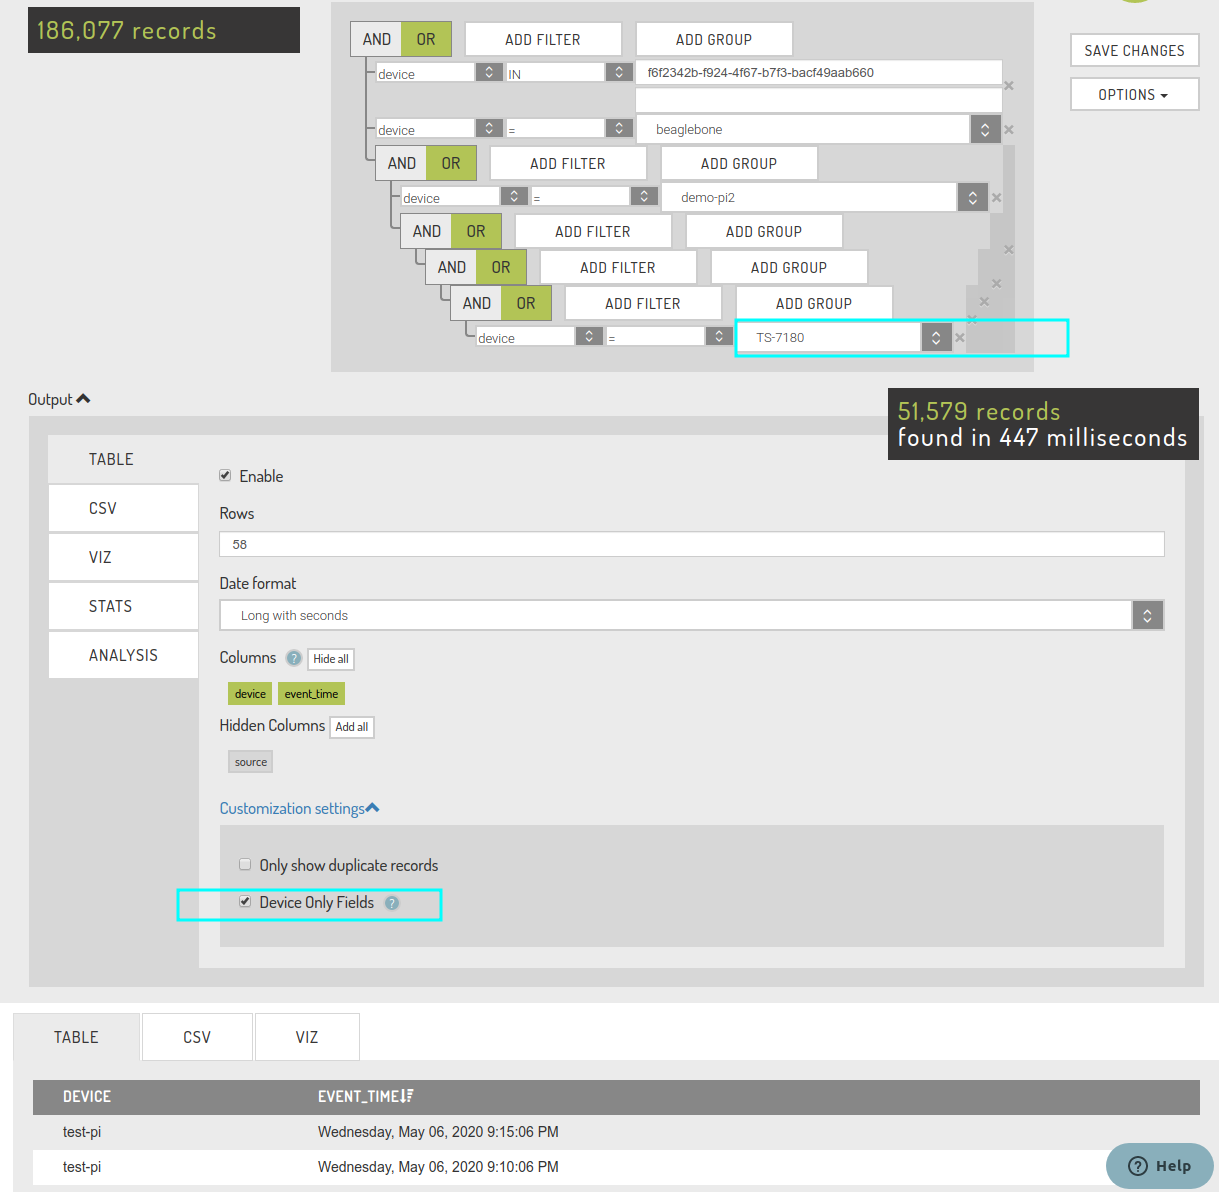
Note: If all devices provided in the search filter are not source providers for the table then all the available columns will disappear as expected.
To return your search columns, either;
correct your search filter, or
uncheck
[Device Only Fields]
Note: the following core fields will always be provided:
sourcedeviceevent_time
Understanding Search Results
Concept: resolved data vs raw data
Search fields contain a variety of resolved data and raw data. Where the data for a particular field is resolved, the option to search against that data is provided to the user as a pre-defined list in a dropdown. eg:
Fields containing resolved data:
[user_id]will resolve to a list of user names within the current workgroup.Precise data matches can only be used for operators
LIKE,IN,NOT IN
Fields containing raw data:
[action]being a potentially endless list is not provided as a resolved list for selection.Precise data matches are not necessary for operators
LIKE,IN,NOT IN. Hence, wildcards can be used.
Working with Logs
Events, such as device activity, source activity and user actions are collected and stored in the audit_logs and incident_logs tables for later interpretation.
incident_logs
Incident logs capture events from alerts that have been pre-created under the [ALERTS] tab. The extent and variety logged are only limited by the definition and number of the alerts you create.
Access
User role(s) of type:
owner,admin,power,standard,read-only
NOTE: Like audit_logs, similar rules apply to searches against theincident_logs table. Please refer to the Audit Logs section for reference.
Further information on Audit Logs are provided here.
Last updated