Dashboard Creation
Reference guide
A dashboard can be used to inspect and/or interact with one or more devices in the Ardexa cloud that share common characteristics. They allow users of a workgroup to configure useful views for every device.
The top-level dashboard in a workgroup is called the Workgroup Overview. This lists all devices in the workgroup, and allows the user to drill down to each device.
Dashboards can be defined via two methods: manually & via the labelling system.
Manually defining dashboards allows the greatest level of control over layout & functionality, and is the best starting point for most users / workgroups. This documentation is primarily concerned with manually defined dashboards.
Using the labelling system allows standard dashboards to be dynamically generated across large workgroups containing devices with similar characteristics. For more information, see Labelling and Dashboards and Labelling.
Navigation
While viewing a dashboard, other devices in the workgroup can be viewed by selecting them in the device drop-down in the dashboard's header.
Creating Dashboards
To create a new dashboard, click 'New dashboard' in the Dashboards menu. This will give you the option of selecting a default device for the template. Selecting a default device is recommended in Workgroups containing devices with different configurations to ensure that relevant fields are populated. A dashboard's default device can be changed later through the Settings dialog.
Layout
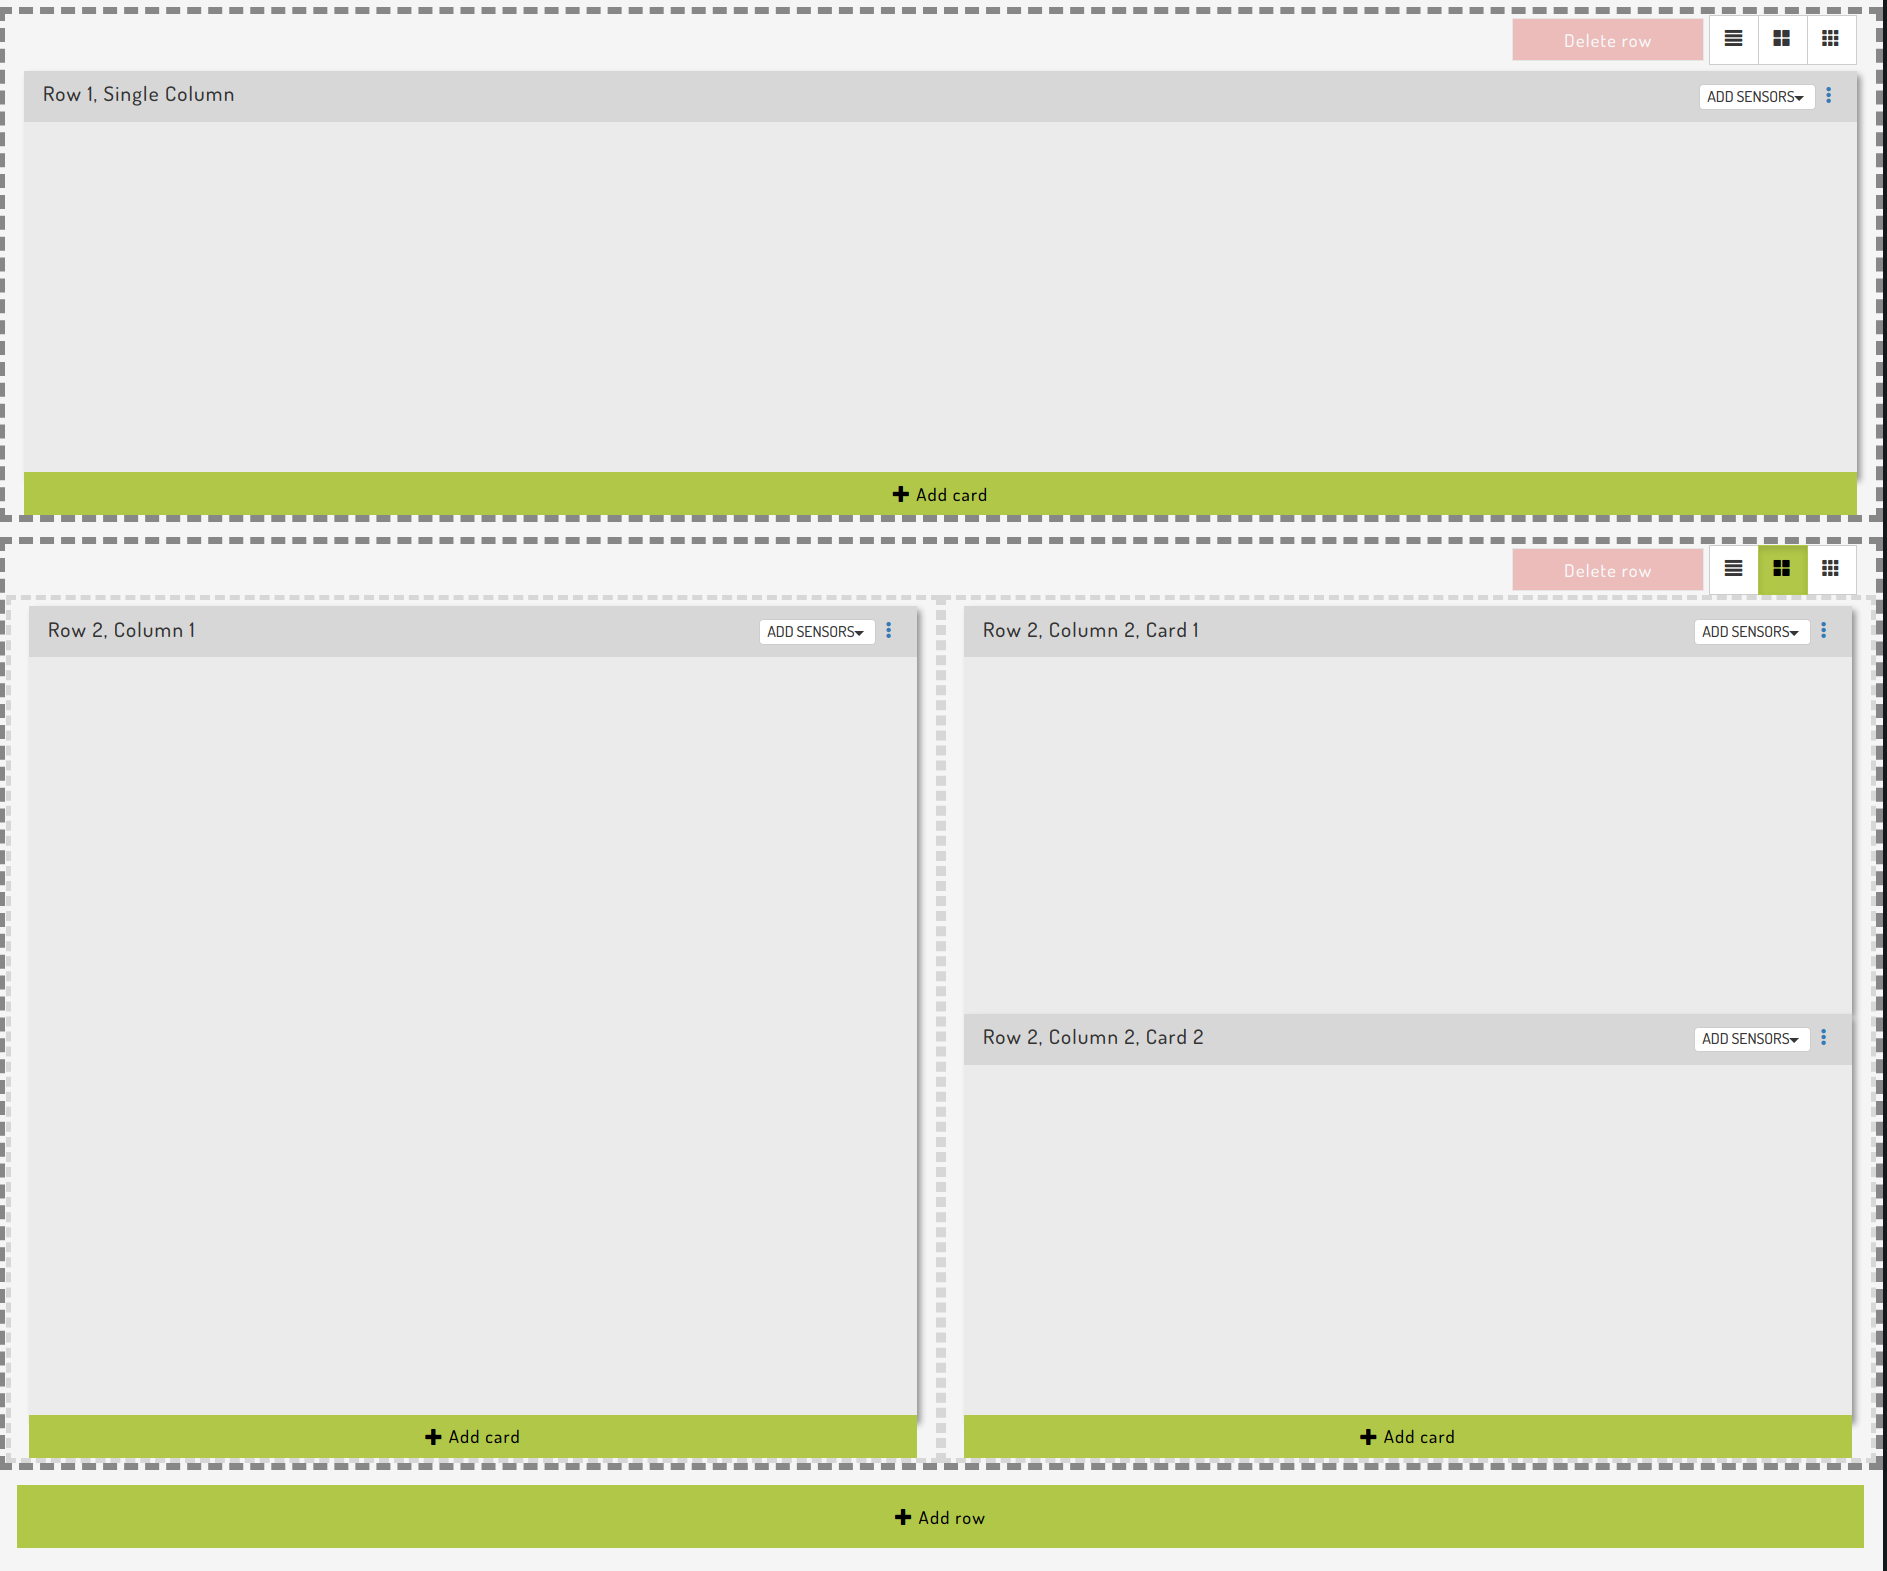
Dashboards are composed of one or more rows. Each row can have one to three equal-width columns, with each column containing one or more cards. Columns within the same row will be given the same height.
Clicking the "Edit Layout" button will put the dashboard into Edit Layout mode. Thick, dark dashed-grey lines indicate a dashboard row, while thin, light dashed-grey lines indicate a column.
If you want to stack multiple full-width cards vertically, we recommend creating multiple rows containing a single card, rather than stacking multiple cards within the same column.
Cards can be dragged and dropped between rows and columns.
Rows & columns can not be deleted if they contain cards; move or delete cards to enable deletion.
Saving Changes
Changes made to a dashboard need to be explicitly saved by clicking the 'Save' button. Clicking 'Discard' will reset the dashboard to the last saved state. When a new dashboard is saved, you will be prompted to enter a name for the dashboard, if you haven't set one already.
Additionally, if the current device doesn't have a default dashboard, you will be given the option to make it the default dashboard for the device.
Sensor Cards
Sensor cards allow the user to view the latest state from a device, represented by one or more units arranged on a canvas. For a full guide to sensor cards, see Configuring sensor cards.
Graph Cards
Graph cards chart the recent history of one or more device variables over a configurable time period. At the moment, only data from scenarios with a type of CSV can be graphed within a graph card.
The graph card's configuration dialog will display a list of available input streams. Streams with retrievable values will display a preview of the latest value in the list.
Photo Cards
Photo cards display the latest image captured by a Watch source on a device. If a device is configured to upload images to the Ardexa Cloud, the Photo Card will initially display the most recent image uploaded today.
Sharing a Dashboard
Once saved, newly created dashboards are visible only to you. To share a dashboard with other users, click on the 'eye' button in the dashboard's header.
To share a dashboard, you will need the 'Manage Searches & Dashboards' user permission.
When shared, a dashboard will be visible to every user in the workgroup, or the selected device groups.
Sharing searches and dashboards is covered in detail under the article: Data Access > Limit Saved Dashboard and Searches
Deleting a Dashboard
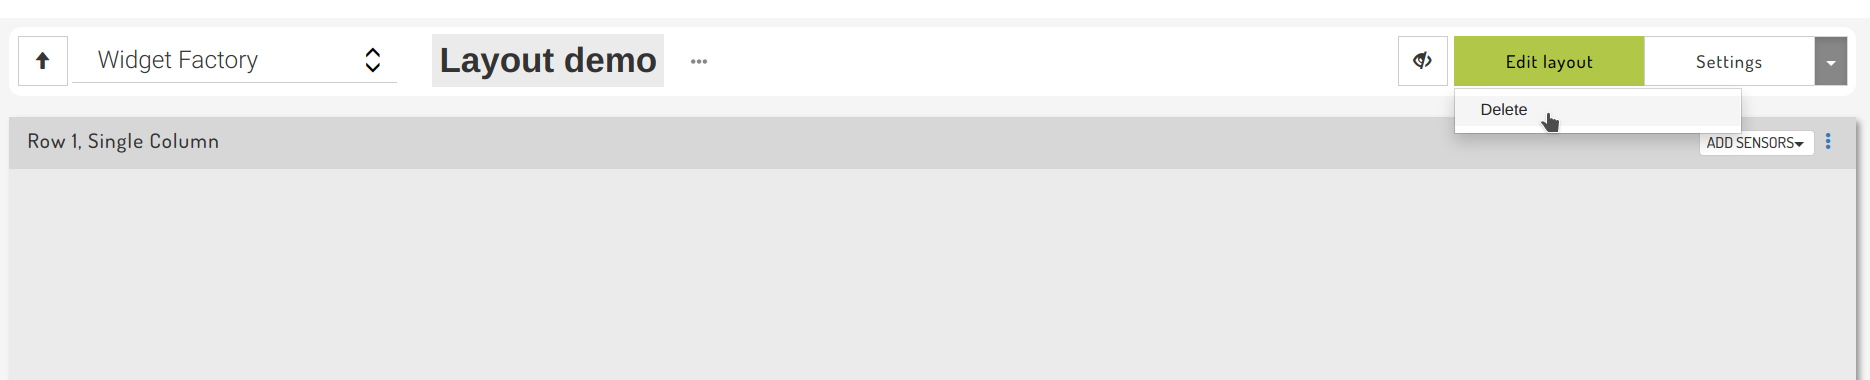
To delete a dashboard, open the dashboard and select the 'Delete' option from the settings menu:
If the dashboard is the default dashboard for any devices in the workgroup, these dashboards will revert to having no default dashboard.
Note: only the user who created a dashboard can delete it. If you would like to remove a shared dashboard that someone else created from the Dashboards menu, you can un-share it.
This will make it visible only to the user who created the dashboard.
Workgroup Overview
The workgroup overview is an automatically generated dashboard that provides a summary of devices in the current workgroup. Users can click on each plant's name to drill down and view the default dashboard for each device.
Default Dashboards
Clicking on a device's name in the Workgroup Overview dashboard will display the default dashboard for that device. By default, Workgroups with labelled devices will display a read-only dashboard generated from the labelled sources on the device.
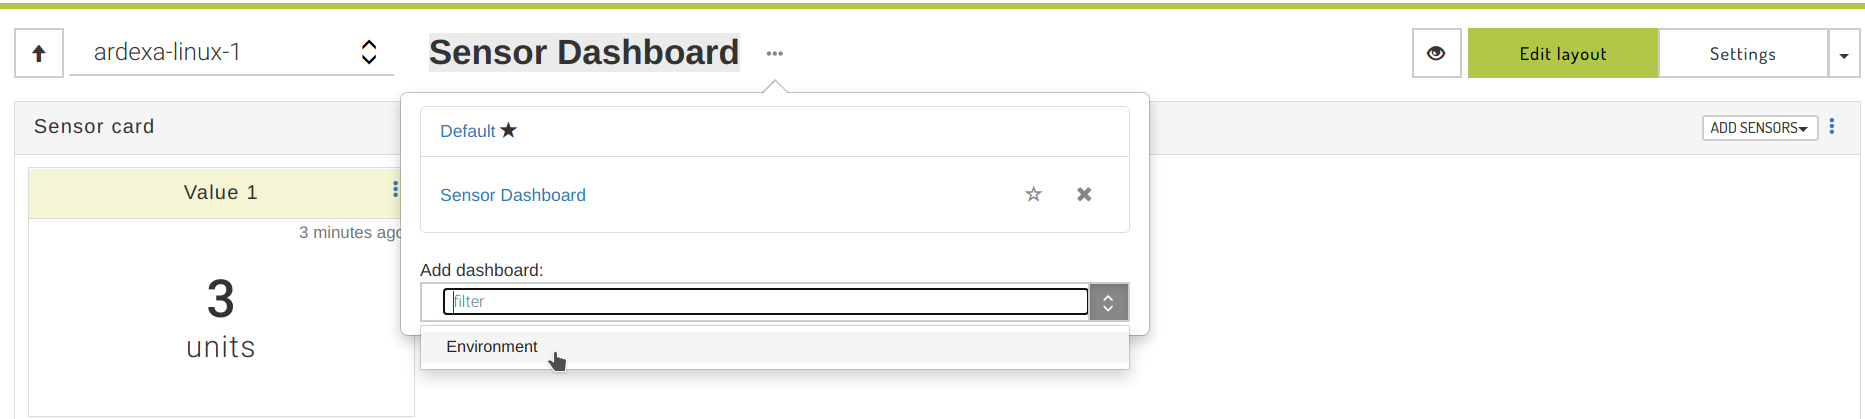
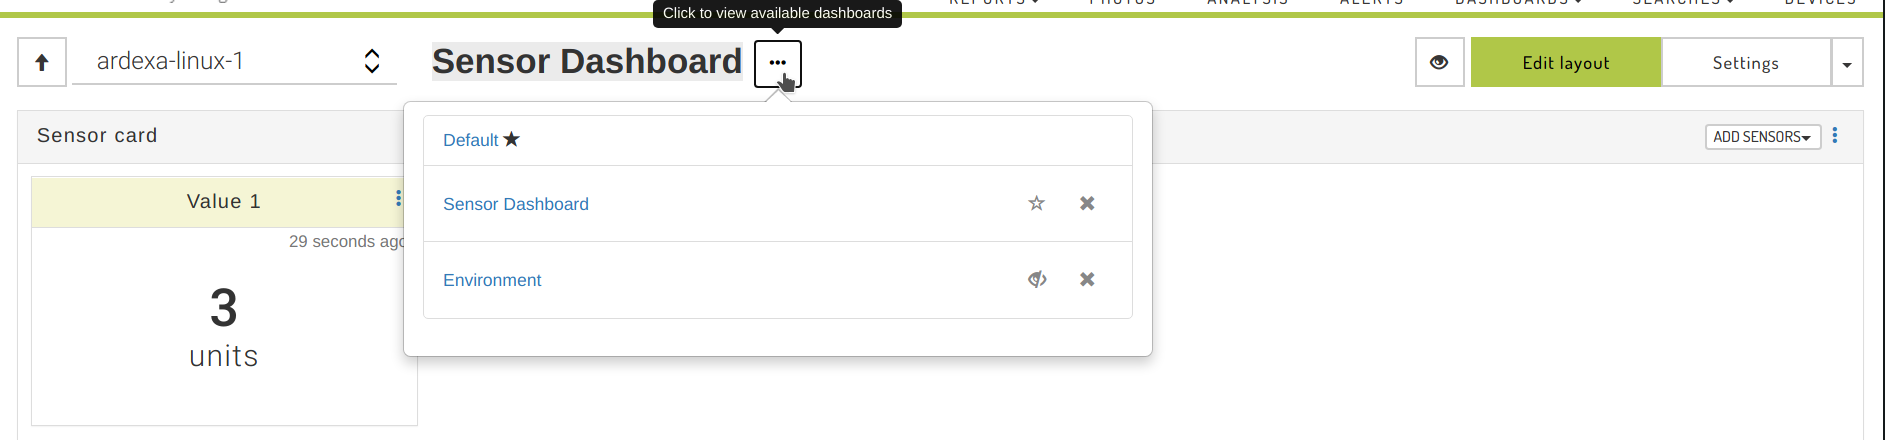
A list of dashboards associated with a device can be viewed by clicking on the '...' button next to the dashboard's title:
Clicking a dashboard's name in this dialog will display the current device using the selected dashboard.
Users with the 'Manage Searches and Dashboards' permission are able to change these settings.
Adding a Dashboard to a Device
If one or more dashboards can be added to the current device, they will be listed in the 'Add dashboard' drop-down:
Selecting a dashboard will associate it with the current device.
Removing a Dashboard from a Device
Clicking the X button next to a Dashboard will remove it as an option for viewing the current device.
Setting a Device's default Dashboard
The default dashboard for the current device is marked with a star. To make a different dashboard the default, click the star button next to it's name. When users click on the device in the Workgroup Overview, this dashboard will be displayed by default.
Dashboard sharing and defaults
Only dashboards that are shared with the entire workgroup can be made the default for a device. Private or device group-restricted dashboards can be associated with a device, but will still only be visible to users that have access to them.
Managing device dashboard settings
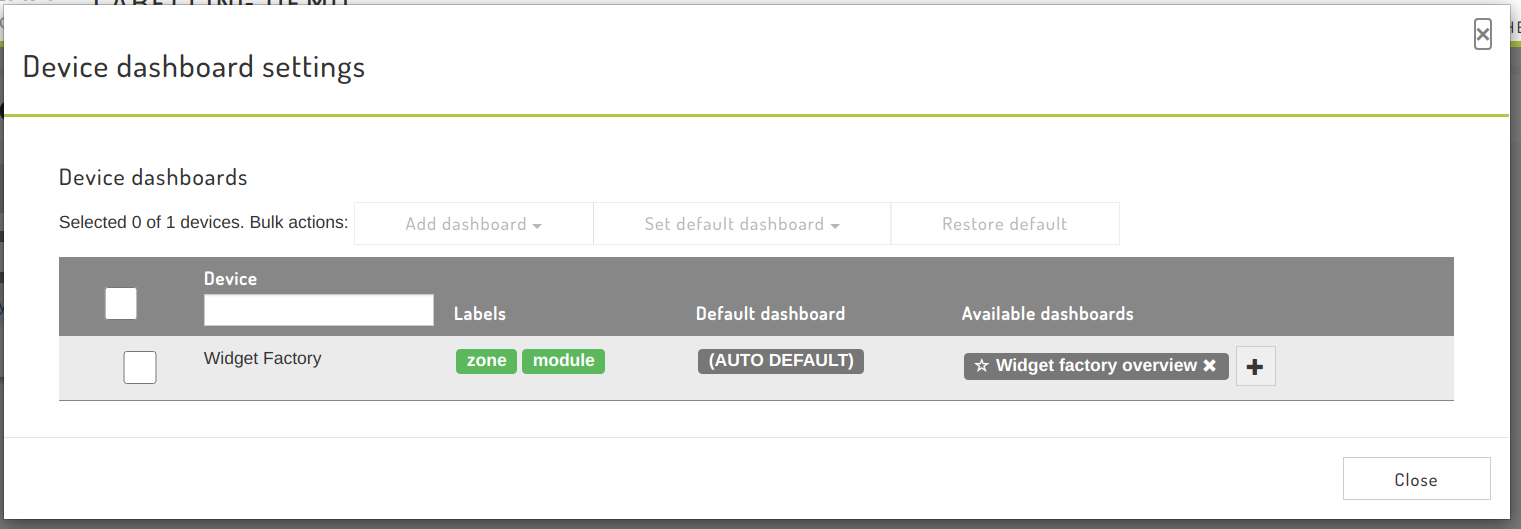
These default settings can also be managed in bulk via the "Link devices and dashboards" button on the Workgroup Overview.
The dialog will list all devices in the workgroup. For each device, it will list:
Labels: A list of unique labels applied to the device's sources. Labels with Dashboard Settings defined (see Dashboards and Labelling) will be coloured green, while those without will be grey.
Default dashboard: the dashboard that will be displayed when clicking on the device in the workgroup overview. (AUTO DEFAULT) indicates that the dashboard has been generated from the labels on the device
Available dashboards: a list of dashboards that can be used to view the device. These support the following actions:
Click the + button to add a new dashboard to the device
Click the 'star' button to make a dashboard the default for the device
Click the x button to remove an available dashboard from the device
Devices can be filtered and selected via the check boxes on the left. When multiple devices have been selected, bulk add, set default and restore default actions become available.
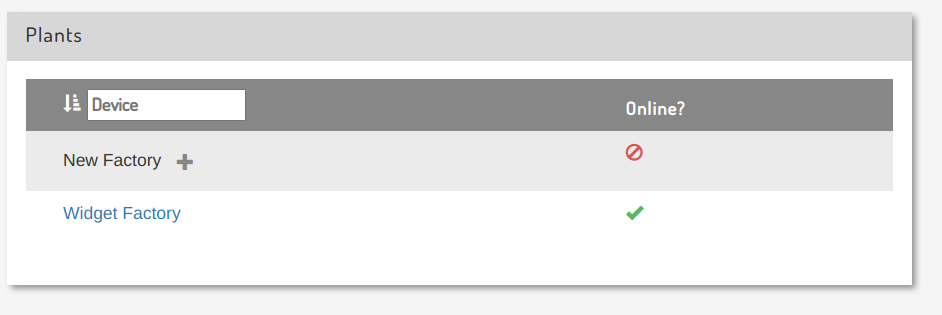
New Devices
Devices that do not have dashboard settings defined will be greyed-out in the Workgroup Overview:
Clicking the + button will present you with three options:
Use an existing dashboard: choose an existing dashboard. This will make the selected dashboard the default for the device.
Create a new dashboard: this option will create a new dashboard for the device. When it is saved, it will become the default for the device.
Label device sources: see Dashboards and Labelling for a full description of this option.
Last updated