Machine Plugins
Install, configure and manage Ardexa plugins to interact with local hardware
Permissions
Users will not usually have access to all of Ardexa's machine plugins. Access is given to those machine plugins relevant to the Workgroup. Users can, however, see all of the available machine plugins. If you need access to machine plugins listed as "Not available", please contact Ardexa support.
In order to use the Machine Plugins tab, your user account must have the Control Devices permission on the target workgroup and/or device.
Device Prerequisites
To install machine plugins on a device, the device must first:
be running Agent version 2.4.1 or greater
be configured to support dynamic mapping
have Ardpkg, the Ardexa package manager installed
These will be checked on the target device when the Machine Plugins tab is opened.
If an agent upgrade is required, go to the Admin -> Device Maintenance page to upgrade the agent on the device. Follow the prompts on the Machine Plugins tab if dynamic mapping or Ardpkg need to be configured.
Installing Machine Plugins
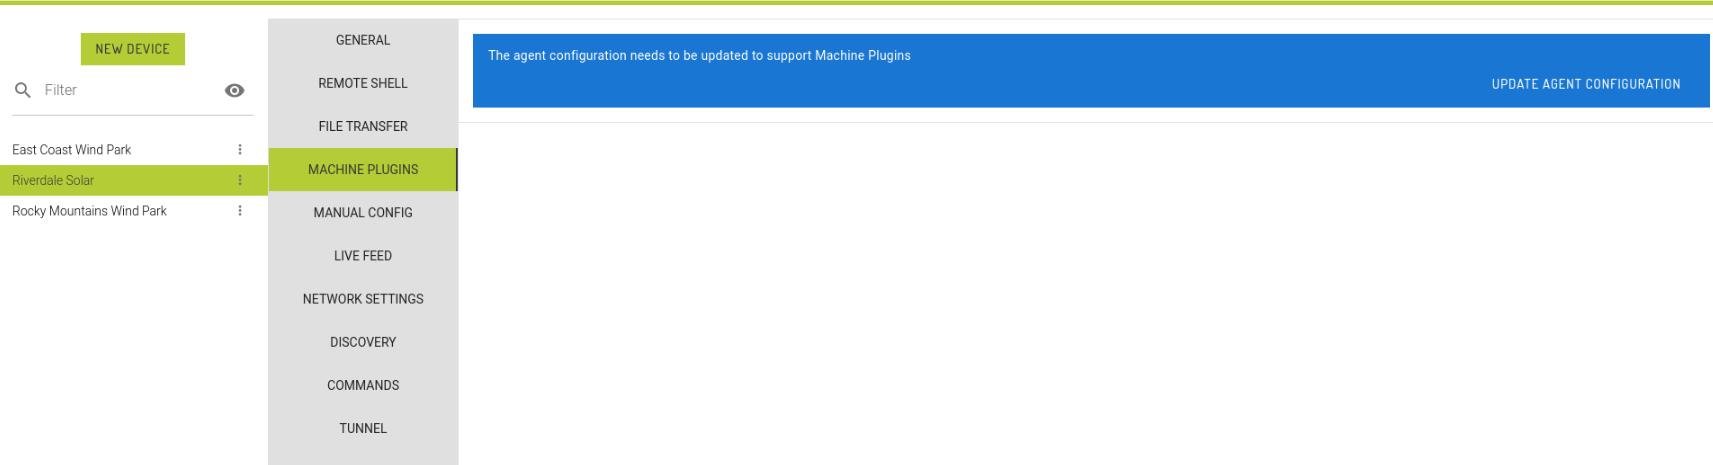
When selecting the Machine Plugins tab, you may sometimes see the message "The agent configuration needs to be updated to support Machine Plugins". If you do, then it usually means that the Machine Plugins application has not been installed OR the Machine Plugins applications needs to be upgraded. In either case, please continue by selecting the "Upgrade agent configuration" button. If after upgrading, the message has not disappeared, please contact Ardexa support.
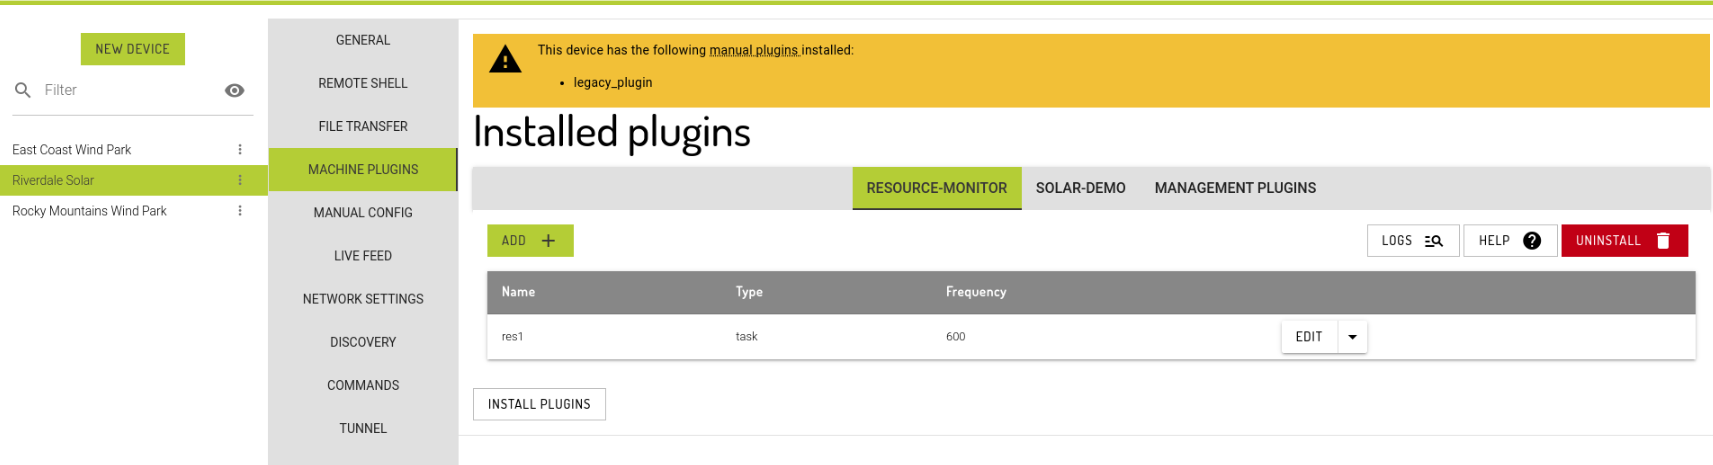
Warning: conflicts with static scenarios and legacy plugins
Devices with manually installed Ardexa plugins need to be handled carefully. Machine Plugins and ardpkg can attempt to install software versions that may conflict with software already running on the device. If any static scenarios are found, a warning will be displayed in the machine plugins tab. The Static tab will also display a list of statically configured scenarios found on the device, see below.
If in doubt about this warning, contact your Ardexa account manager.
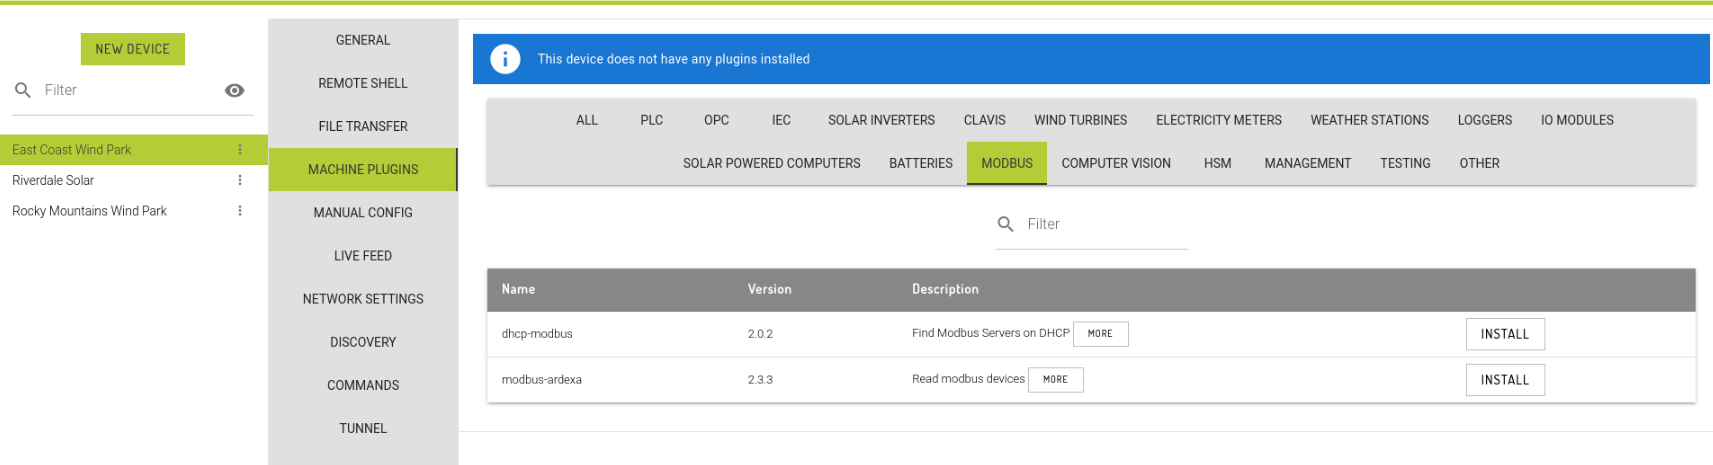
Select the Machine Plugins tab, select the label (category) of machine plugin type and identify the machine plugin required. As per the figure below, the modbus-ardexa plugin will be selected.
When you select "Install", the application is installed on the remote edge device. Note the "More" button next to the plugin Description. This will provide a lot more details on the use and function of the machine plugin.
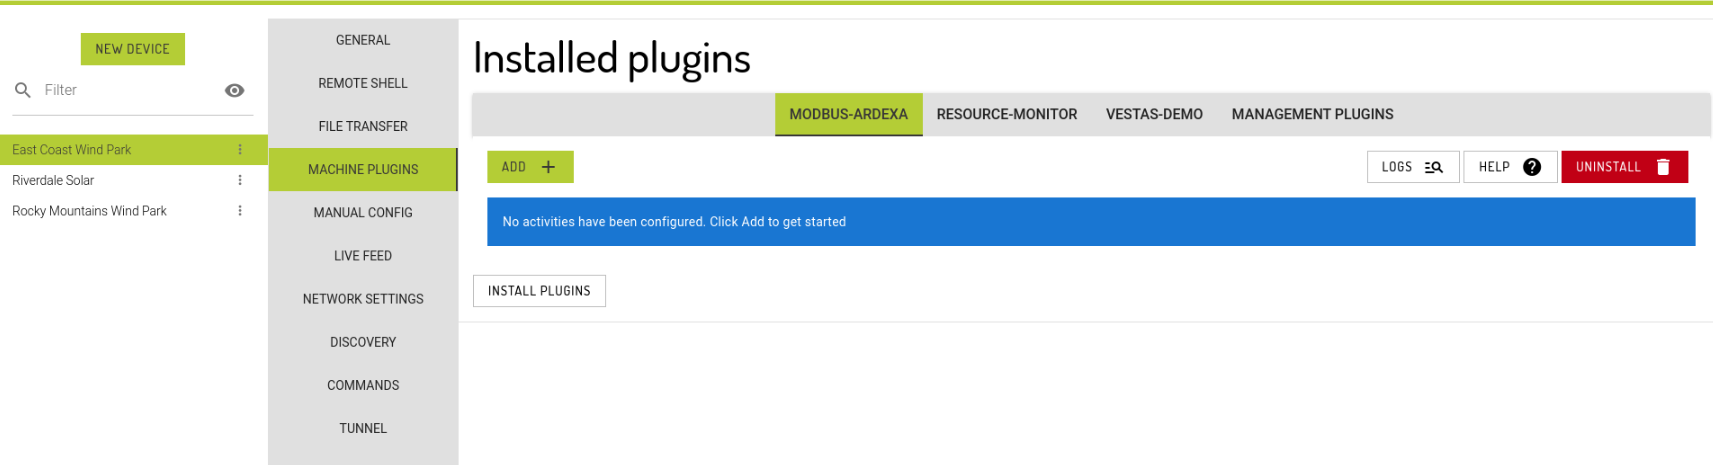
Once the plugin is installed, you can discover data from one or more machines. To do so, first select the "Add+" button as shown below.
Once a plugin has been installed on a machine, new plugins can be browsed and installed on the device by clicking the Install Plugins button in the Admin section.
Each machine plugin is different. As such, the Optional and Mandatory parameters will vary between the plugins. Please use the "More" button to look more closely at the documentation. In the example shown below, the Modbus plugin is used to collect data from a simple time server. The "RUN DISCOVERY" button can be used to view the raw values.
The Discovery button can be selected as many times as possible. Please bear in mind that some machine connections are slow. This is almost always NOT an Ardexa issue, but a function of either the slow connection speed from the edge device to the machine, and/or the slow response of the machine's data server. Furthermore, some machines will output a lot of data. Please check the data is correct before sending the data to the cloud.
Source mapping is another way to put a label / name on a source instead of using the source's actual long name, that is, to make it easier to map to. Add the source entries by clicking the "ADD ENTRY +" button which can either be in a table or a comma separated text value input. You may also copy these source maps by clicking the "COPY" button if there are any source maps set.
Run as a Scheduled Task
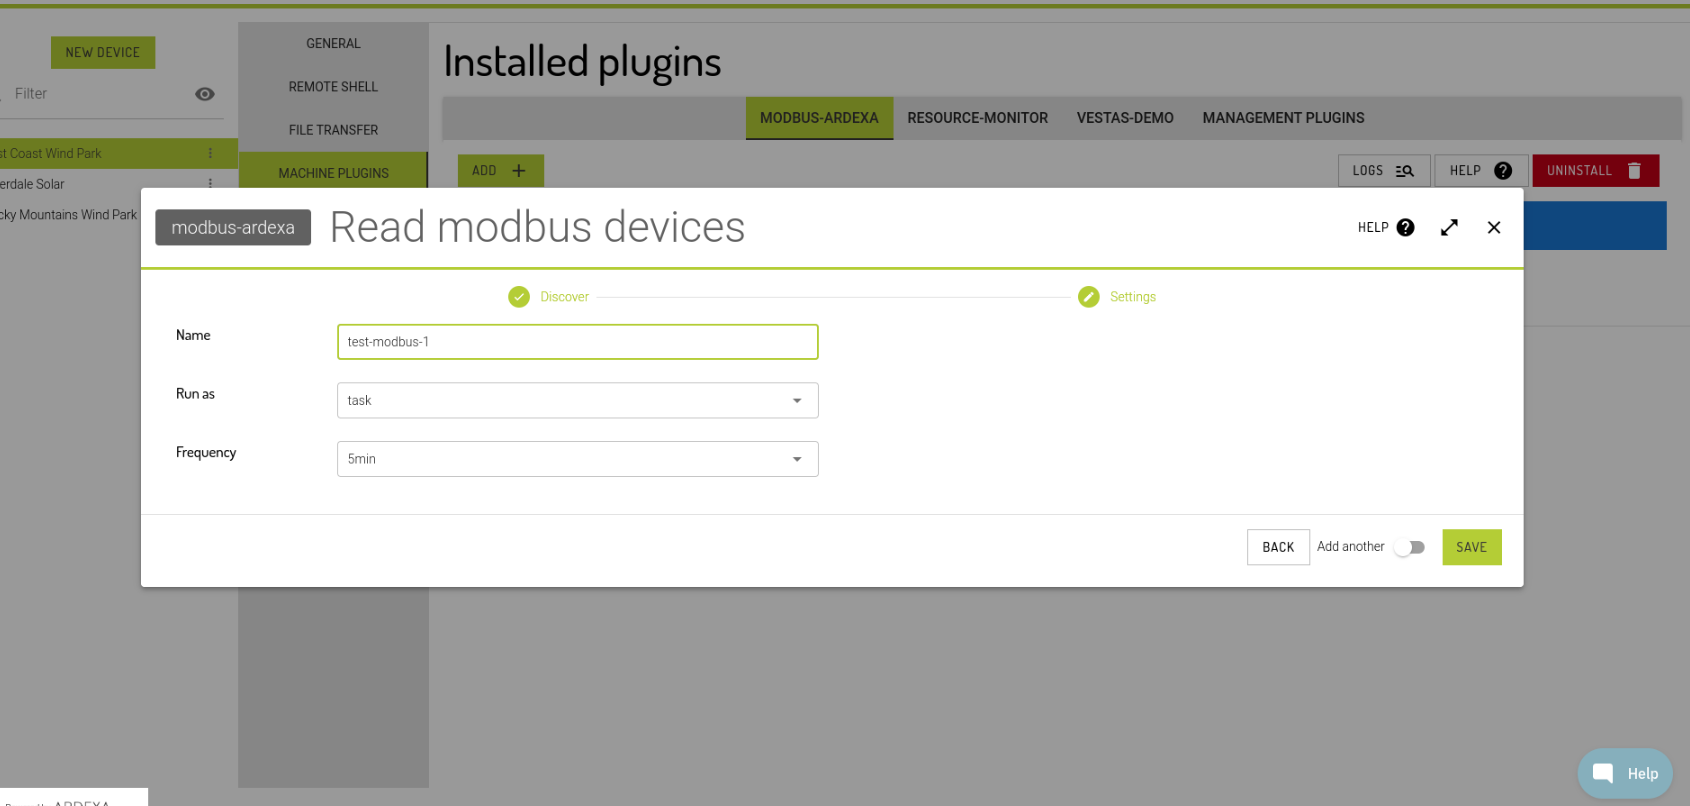
Once you are happy with the data, you can then send it to the cloud at regular intervals using the button "RUN AS A SCHEDULED TASK". As the name suggests, this will send data to the cloud at regular intervals. On some plugins, a MINIMUM interval is sometimes mandated, since in Ardexa's experience, the machine will not respond quicker than a certain time. For example; trying to query data at (say) 5 second intervals from machines connected via RS485 serial lines is NOT POSSIBLE. And so, the plugin will prevent the tasks from running at this rate. Again, this is not an Ardexa limitation, but a limitation with the remote machine's operating environment.
As per the above figure, once the Name and Frequency have been selected and SAVE selected, then the data will start sending to the Ardexa cloud at the agreed interval. Note that it may take a few minutes for the data to appear.
If multiple similar tasks need to be created, clicking "Save and Add Another" will create the task, then re-populate the task settings dialog with the saved settings.
Run as a Service
If the data needs to be sent to the Ardexa at a rate than (say) faster than 1 minute intervals, it is probably better to send the data via a SERVICE. For instance, if you need to send data to the cloud at 1 second intervals or faster, do not use "RUN AS A SCHEDULED TASK". Use the SERVICE option. If you need further information, please contact Ardexa. Also, bear in mind that some plugins may not offer the RUN AS A SERVICE option, for a variety of reasons.
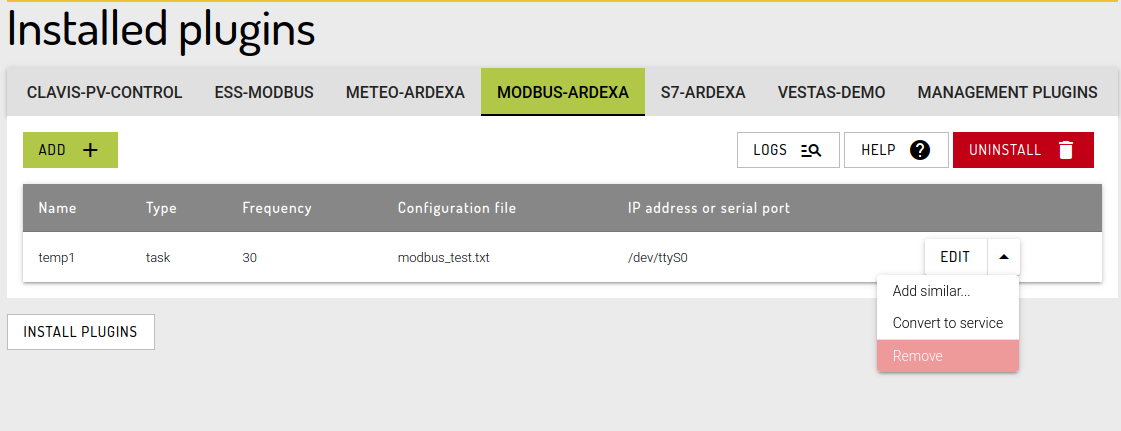
Convert to Task -> Service, and Vice Versa
Running a plugin scenario as a service can use a lot less resources. To convert a scenario in MACHINE PLUGINS from a task to a service (or vice versa), use the drop down button next to the EDIT button as below.
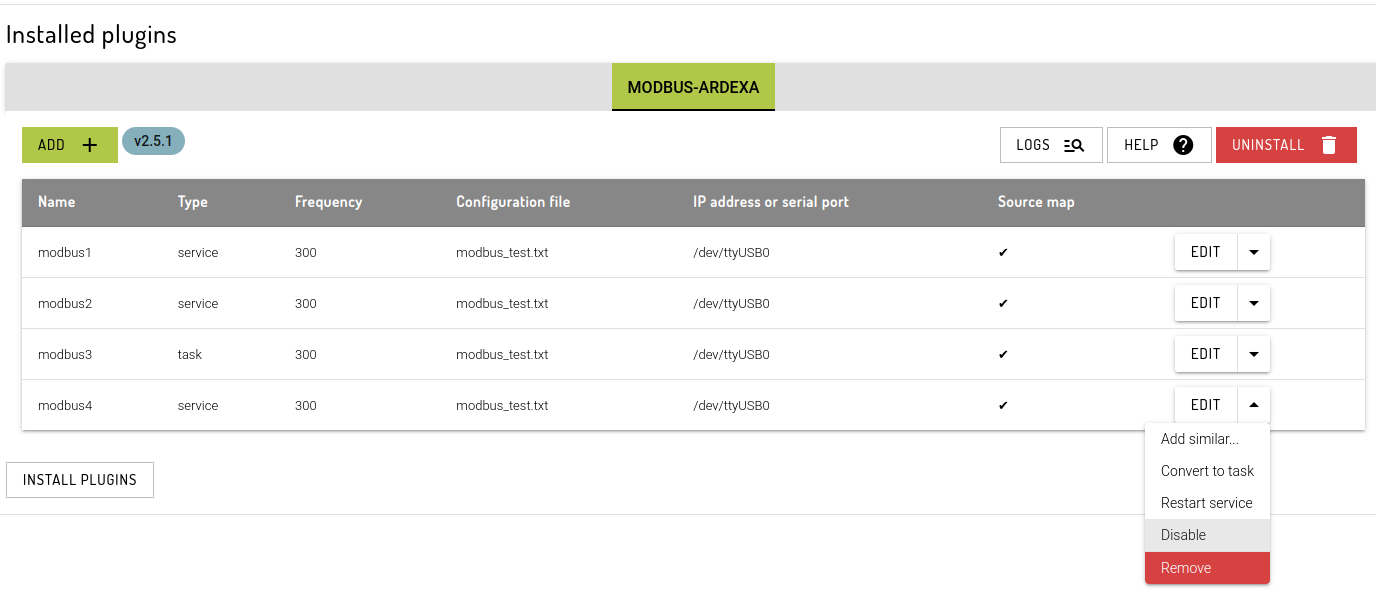
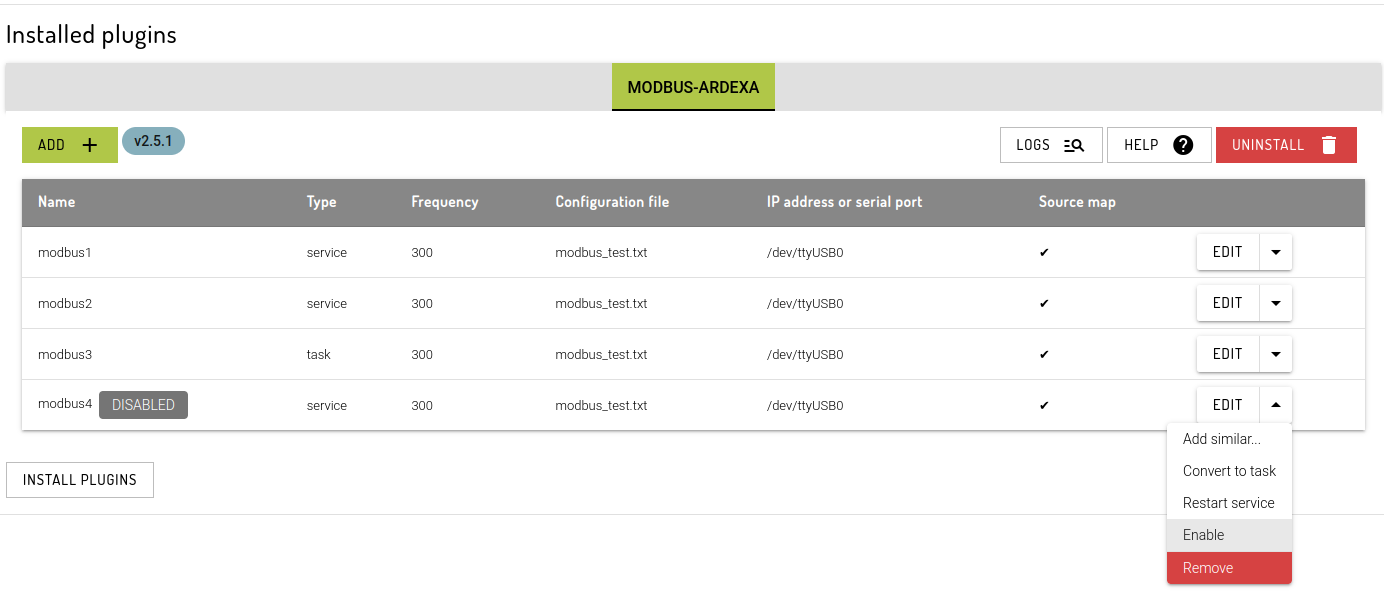
Disabling and Enabling a Service or a Task
A recent feature update (January, 2023) has been added to accommodate the disabling and enabling of a service. Tasks, have had this for awhile, however this is new for the service.
Similar to converting a service/task, use the toggle next to the EDIT button to see the drop-down and click on the Disable/Enable option below.
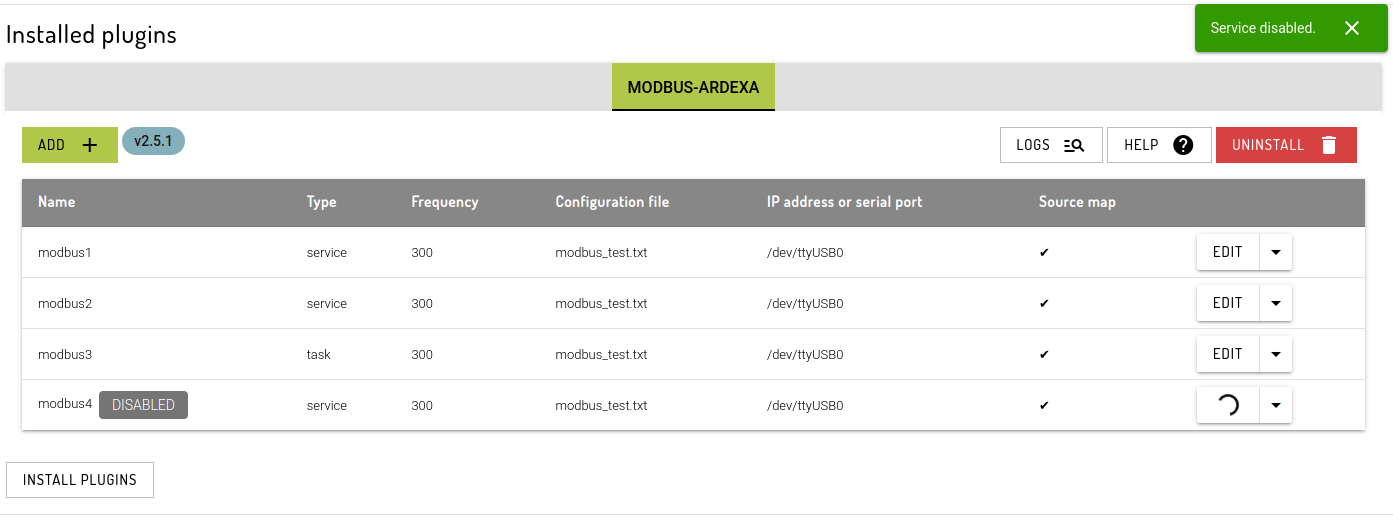
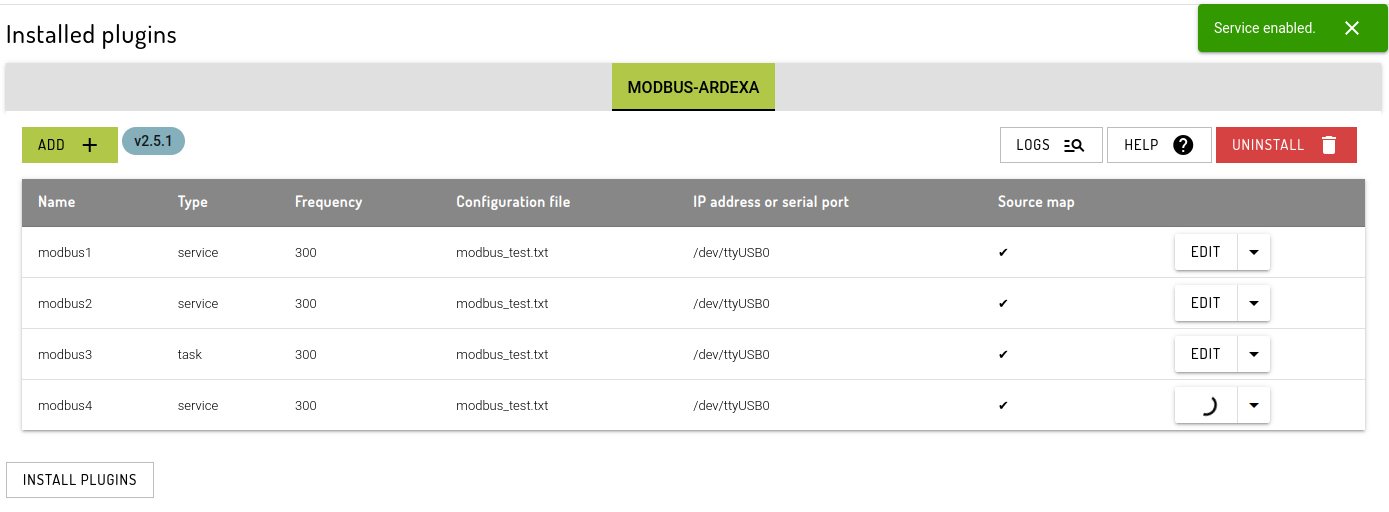
Once the Disable option has been selected, a popup notification will be displayed to confirm that the service has been successfully disabled. There will also be a "DISABLED" stamp beside the service to show which of the services are not active.
Enabling a service is the same as disabling one. See image below:
All enabled services are enabled if they don't have the "DISABLED" stamp beside the name.
Last updated