Create new entity
There are two ways to create a new entity
Create an empty entity
Use the wizard to create one or more entities for you based on an existing device(s)
Browse to Admin -> Entities and then open the Manage tab. But before we jump into creating entities, it's best to discuss some terminology and best practices
Getting started
While there are no entity "types", all entities are inherently the same thing, we will be discussing "device" entities and "source" entities. These terms are used to assist with visualising how the data streams generate by your devices map to the various entities. Generally the "device" entity will be the name of the plant, park or site and contain data streams that relate to the state or performance of the whole system. "Source" entities will then sit one or more levels under this top-level entity and contain data streams that relate to specific pieces of equipment, such as a PLC, solar inverter or weather station.
As we will see further down, one "device" entity might represent many edge devices if you have a very large (in data or geography) plant that requires a number of edge devices to capture all the necessary data.
For the remainder of this document, we'll be using a solar farm as the example use case. Solar offers a simple, well structured example that most users can follow, even if they aren't solar specialists. This will showcase some of the basic principles of creating and organising entities.
Create empty entity (Entity editor)
Creating an empty entity will simply open the entity editor with a new, blank entity. This dialog window is the same window used when editing an existing entity, so it's worth becoming familiar with the available features.
Using the entity tree, browse to the entity where you would like to create a new sub entity and select it
Click on the Add sub-entity button and the select "Empty"
The entity editor will appear. Give the new entity a name, add some data streams, labels or metadata
Click Save (or Cancel to discard changes)
Naming the entity
The name of the entity is at the top of the dialog window. You can edit it by simply clicking in the text field. An entity must have a name.
Data streams
This section allows you to view, add and remove various data streams or fields (aka tags) from the target entity.
Add data stream
To add a new data stream, click the Add button. A new dialog will appear with three choices
Sources: select a single device and one or more sources to add to the entity. Adding a source will add all data streams associated with that source.
Fields: select a single device and source, and one or more fields. This is useful to "cherry pick" certain fields into a new entity.
Energy: this is a legacy item and should be ignored
Once you've assembled the desired data streams and fields, click Save. Repeat the process if you need to add other sources or fields.
Tables and fields
Now you will see all the fields resolved in the "Tables and fields" tab, grouped by table. Any linked sources will be resolved into the available fields. The major advantage of this is that because the source is linked, not the individual fields, if the fields were to change (say, a new field was added), the entity would automatically inherit this change.
Any fields added directly to the entity can be removed using the X button in the "Action" column.
In the "Field" column, you will see an Edit button. This enables you to add an alias to a field name. The three main uses for aliases:
Consistent field names: If you are collecting data from a variety of vendors, you'll inevitably run into a situation where they will call the same thing by a different name. This makes some tasks quite challenging such as creating dashboards or alerts. Aliases allow you to add an alternative name for a given field to help you normalise your data naming, without needing to change the underlying data.
Removing unique IDs: when logging data from a machine, it is sometimes necessary to log data from a variable number of attached components. Usually these end up being named
field 1,field 2, etc. When creating an entity for the component and linking these fields, it is important to alias these names back to simplyfield, so that they can be reliably used in alerts and dashboards.Differentiation: Say you have three devices, two monitoring reservoirs and one monitoring a water pump. Both reservoirs have a field
Water level, which are important to the pump. Adding both fields would cause a conflict and offers you no way to tell how the field relates to the pump. Instead, create an alias for each field:Upstream water levelandDownstream water level.
Sources
Form the "Sources" tab, you can view the linked sources. To remove a source, simple click the X in the "Action" column.
Energy
This is a legacy feature and should be ignored
Labels
Simply click the Add button, select the desired labels and click OK.
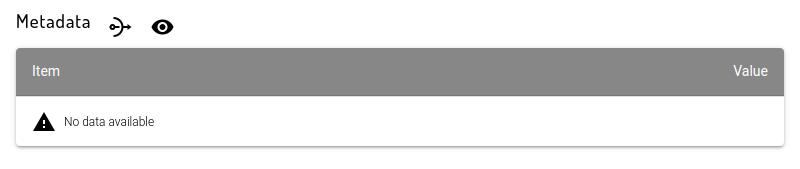
Metadata
Metadata has two buttons:
Edit inheritance
Show empty items
By default, Metadata will only show the populated items. To see all available metadata, simply toggle Show empty items.
Inheritance is the ability for an entity to use existing metadata already loaded onto a device or source. An entity can only inherit from one device or source. When creating entities using the wizard (see below), this inheritance will be automatically populated. Generally speaking, it's preferable to add metadata directly to the entity. This allows you to decouple the information from the specifics of the data collection.
To edit a metadata item, simply click on the right hand side of the row you wish to edit, make the necessary change and then click Set. Don't forget to save the entity, otherwise the changes will be discarded.
Advanced
If for some reason you need the ID of the entity, you can click this button to see the code behind the entity. The ID will always be the first item.
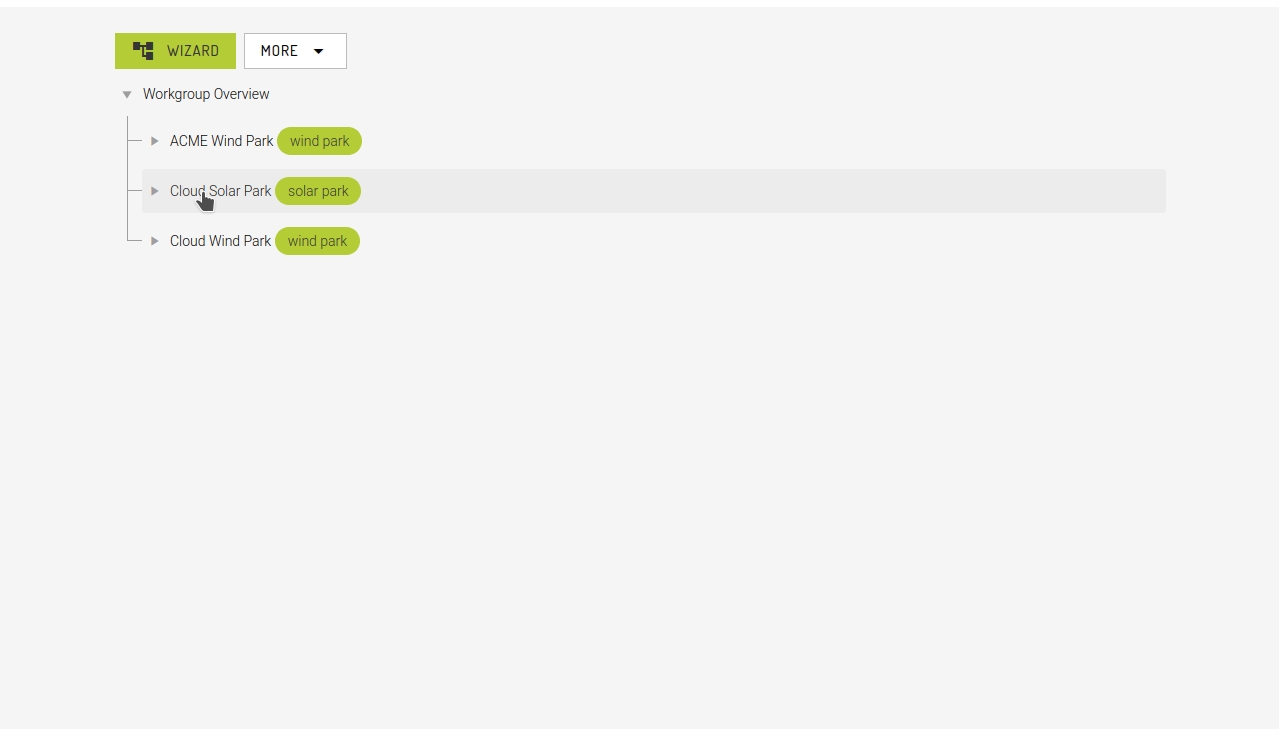
Use the wizard
The goal of the wizard is to enable you to create many new entities using a drag-and-drop style interface. In general, you will process one device at a time, converting the many sources (streams of data) into a hierarchy of new entities. Then you can either process another (a great way to speed up the initial conversion to using entities) or save and exit.
There are two ways to use the wizard. One is to simply click the Wizard button (top left) and follow the prompts. The other is to select the "Using wizard" option when selecting Add sub-entity (see above animation).
By default, the wizard will hide the devices that have already been processed, except when using the "Add sub-entity" option, in which case it will select any devices associated with the target entity.
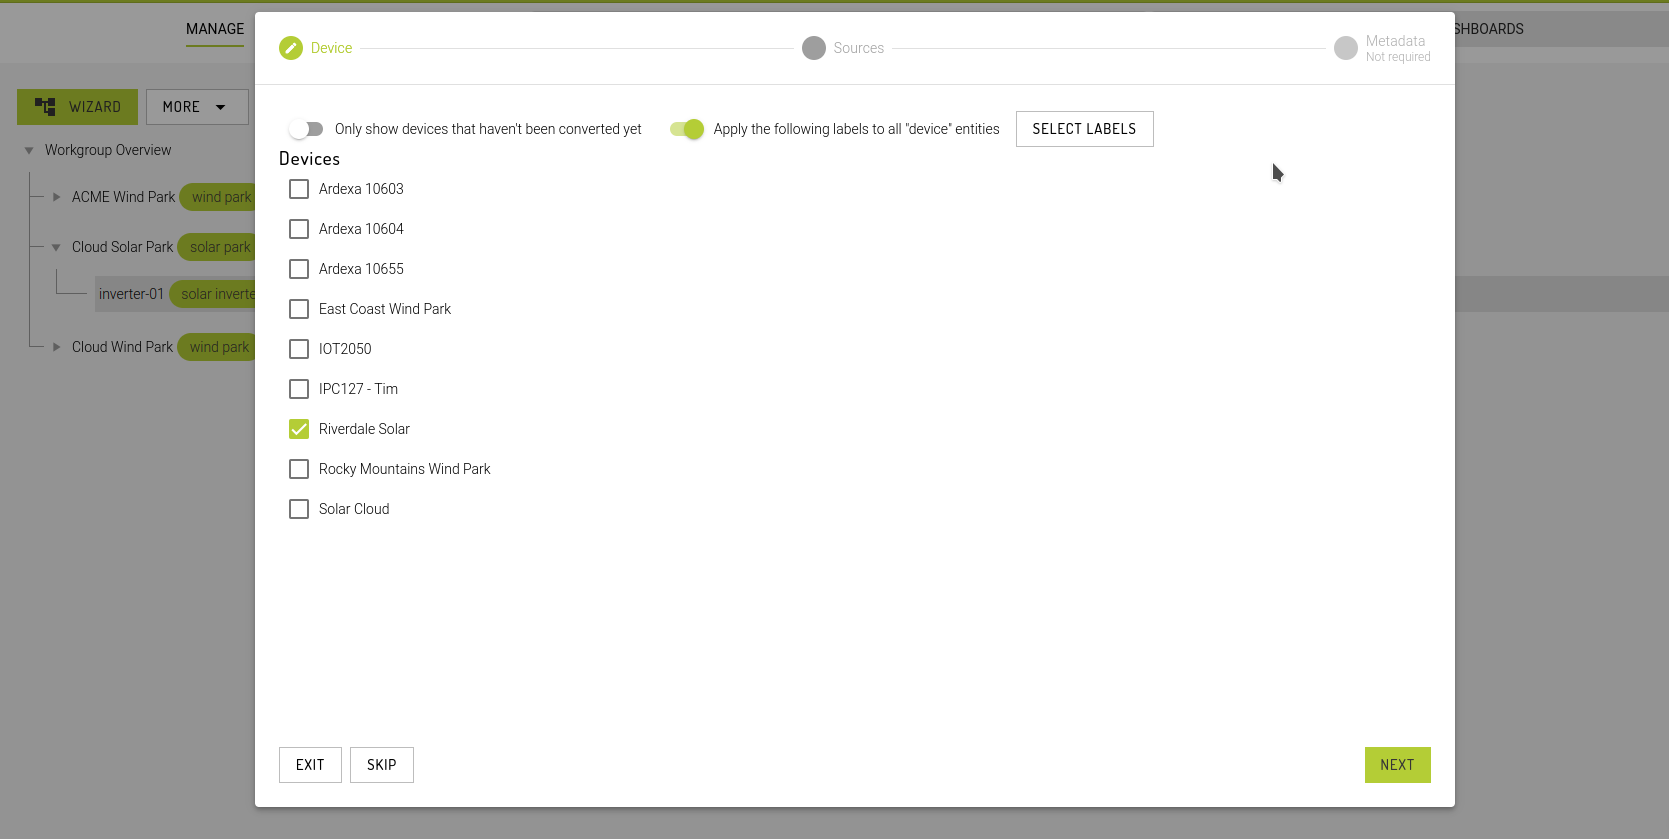
Step 1: Select the target(s)
If you used the wizard button, it will simply select the first device in the list. If you use the sub-entity button, it will select any devices linked to the parent entity.
Only show devices that haven't been converted yet
If enabled, this setting will attempt to find any devices that already have an entity to represent them, and remove those devices from the list. This gives you a clear view of the device that don't yet have an associated entity.
Wizard button will enable this by default, whereas the sub-entity method will leave it disabled.
Apply labels to all 'device' entities
If you are processing many devices of the same type, e.g. wind turbines or compressors, it can be helpful to pre-select the labels to apply to the "device" entity. To learn about processing many devices, see the "Process another" toggle at the end of the wizard.
Skip
When processing many devices, this button can be used to temporarily hide a device. Useful for skipping over devices that haven't yet been deployed.
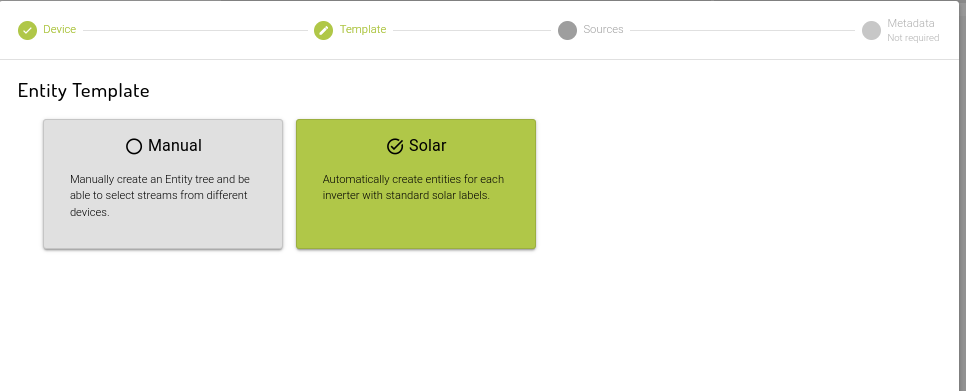
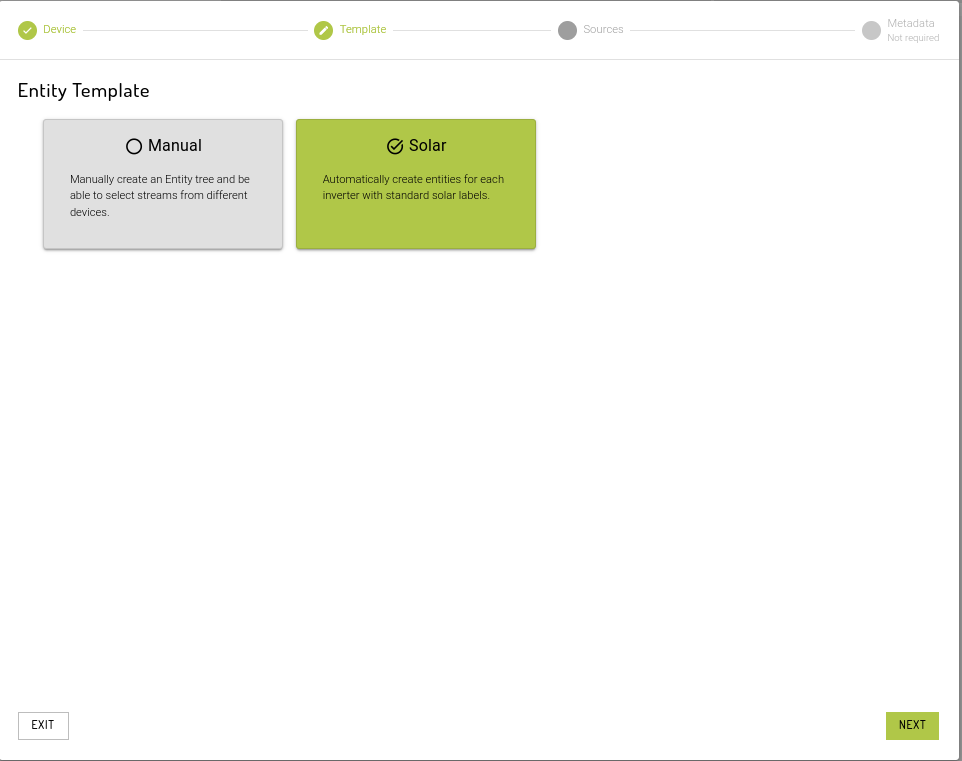
Step 2: Template or Create the entity tree
Workgroups with "Solar Reporting" add-on configured will have the option to choose an Entity template.
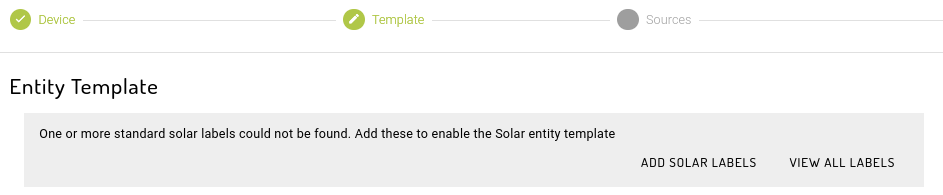
Solar Template
To be able to select a solar template, basic solar labels (Plant, Inverter, Pyranometer and Zone) should all be added first. If not, option to add (Add Solar Labels) will be displayed.
Once all solar labels are added, select the Solar template and click "Next".
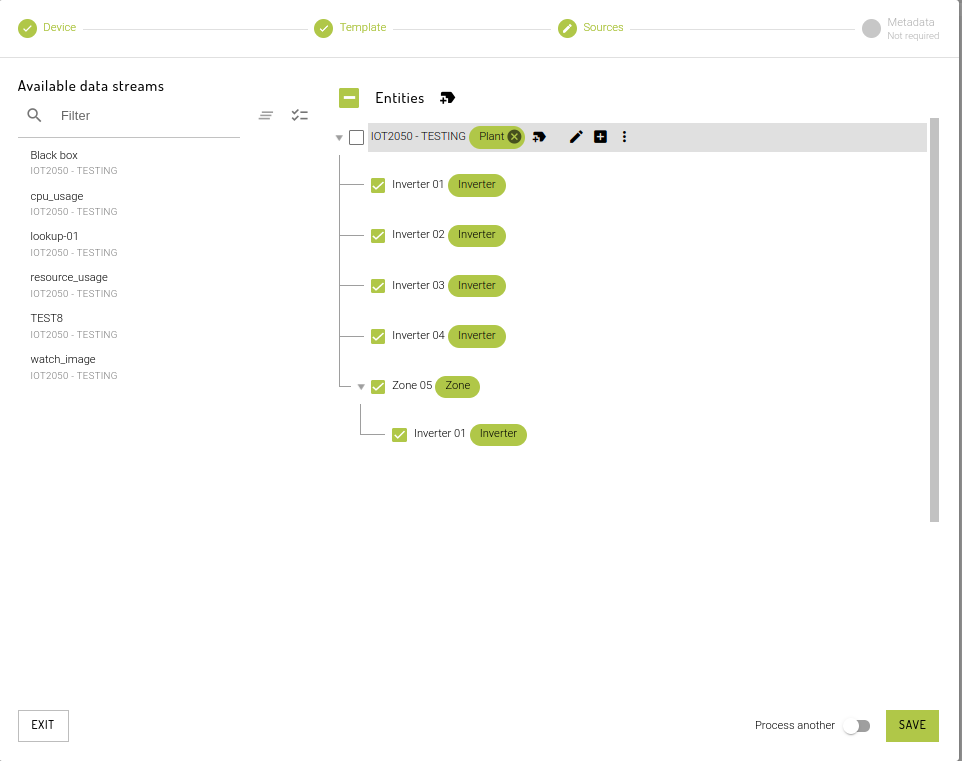
Entity tree will be populated with the Device with a "Plant" label and data streams that are set as "inverter" will be added under the plant with Inverter label.
Streams that are part of a collection will have its own entity labelled as "Zone" and will contain all inverters as its child entity. Add more labels using the label picker beside Entities if needed.
After finish setting up the Entity, click "Save".
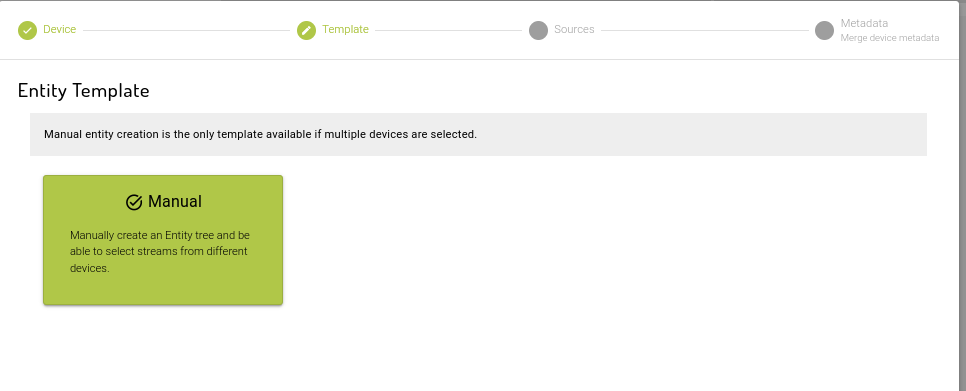
If multiple devices are selected, manual entity creation will only be available.
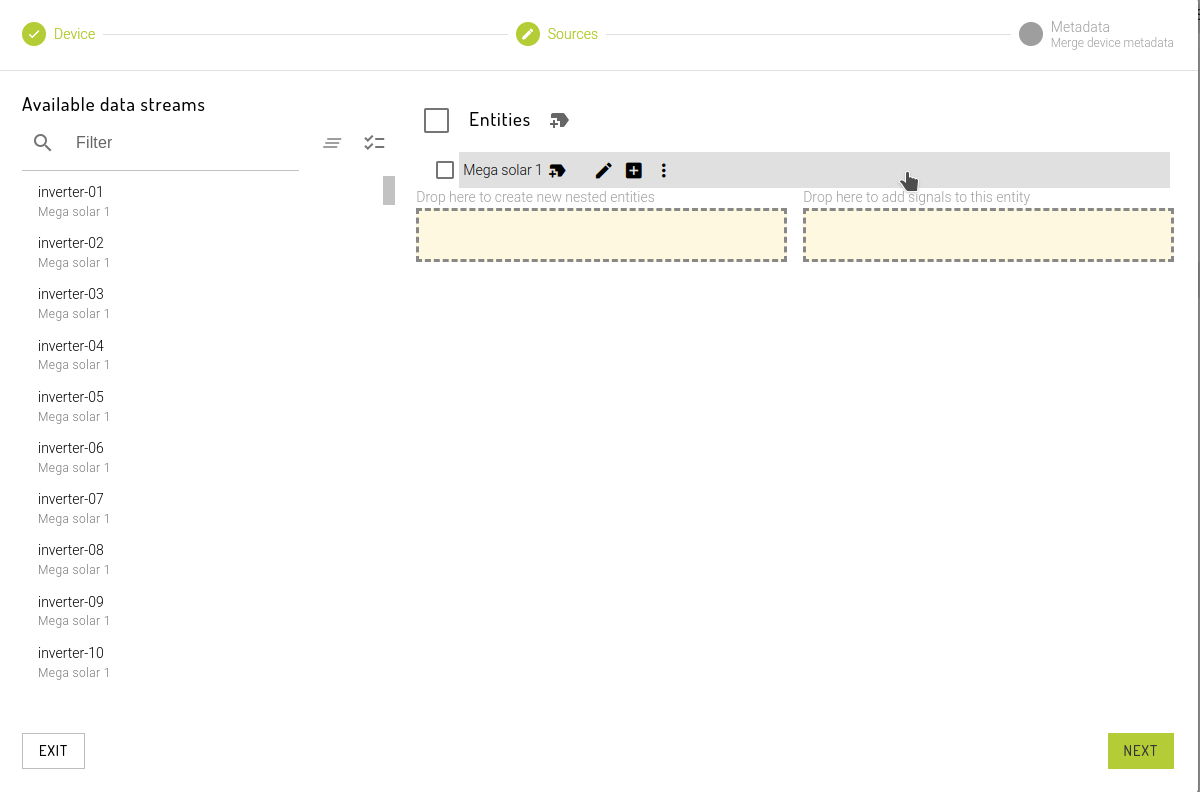
Manual
There are two parts in the Manual entity creation:
The left side shows the available data streams. There is a standard Ardexa list filter with a list of sources from the selected devices (the device name the source belongs to is printed underneath to help identify duplicate source names)
The right side contains the entity tree with an initial "device" entity. It's named after the first device you ticked in Step 1.
Like the entity tree on the management page, you can manually edit or delete any entity, plus you can manually create sub entities. This is used for two main purposes:
grouping entities together, such as grouping inverters into a "zone". You could also use label to achieve the same result, but it's not as visually distinct.
creating entities that only use partial data from a source. For example, most solar inverters provide information about the attached "strings" (rows of solar panels), but this is usually logged at the same time as the inverter data. So we don't have a source representing a string, but we have the necessary data to create an entity and "cherry pick" the relevant fields. See #create-empty-entity for details.
The interface is drag and drop. You can select one or more items from the left and drag them to the right. You can select lists of items by clicking on the first item and then hold the SHIFT key while clicking on the last items. All items inclusive of the two clicked will be selected
There are two drop areas to chose from
Create new nested entities: For each source you dragged in, a new entity will be created and the source will be added to the list of data streams. For sources that log to many tables, all the data streams will be added.
Add signals to this entity: There are some cases where you are collecting data about the same "thing", but they have a variety of different source names. Or, perhaps you have a data source, such as a weather station or power meter that you really want the signals associated with the "device" entity, since the information applies to the whole site/plant. In either of these situations, "Add signals" is the right choice.
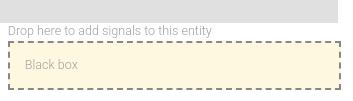
By default, signal sources is added with a
Black boxorCPU Usage(if available). This is to resolve a Device group user's list of entities. The API cross-checks which entities directly have a source that belongs to a device in the user's device group.
If there is no default signal source, work-group users won't be able to see the plant level dashboard for one of their plants
Once you've added a few new entities to the tree, you'll notice that you can now drop sources onto those entities, thereby creating another layer of entities. Using our solar example, we might have zones at the top level, then inverters in each zone, and finally strings attached to each inverter.
When new entities are created, they are automatically "selected". At the very top of the right side, there is an option to "select none/all" for the entity tree. By selecting any entities in the tree, this checkbox will enter the "partial" state. By clicking the checkbox in this state, it will clear the current selection. For the selected entities, the only bulk option is to edit labels.
Similar to other list based interfaces, SHIFT + CLICK is supported to select many entities at a time. This only works for entities that share the same parent, e.g. siblings.
At this point, if you only selected one device, you'll be given the option to save and either exit the wizard, or Process another device, starting the wizard from the beginning. Make your choice by setting the toggle and click Save.
If you selected multiple devices, you will instead have one more step to complete
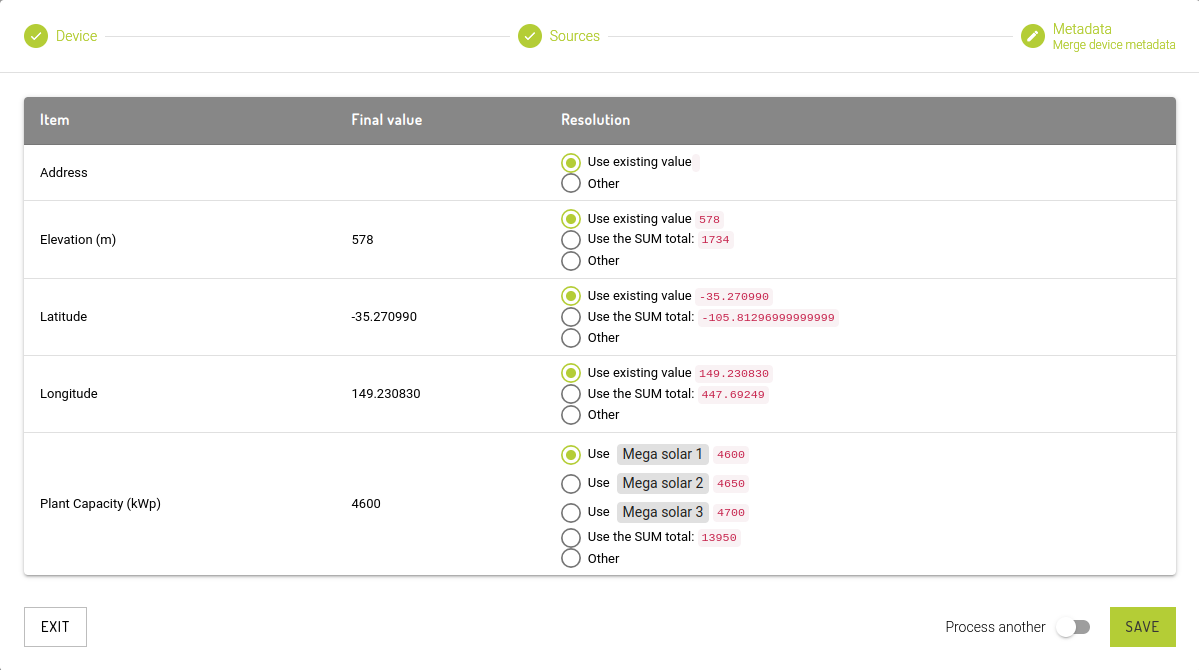
Step 3 (Step 4 for Solar Workgroup): Resolve metadata [optional]
When merging multiple devices, it's important to resolve the metadata. In this basic example, you can see the various options available:
Use existing value: There are two variants of this, depending if the wizard detects that the values are the same or not. If all the values are the same, then only one option will be given. If the options are different, then each option, and the device that it belongs to, are listed.
SUM total: If the wizard detects that all the values are numbers, you will be given the option to use the sum of the values. This is useful for values that should be combined in the new, single entity such as peak power output.
Other: If none of the other options meet your needs, or you simply want to input a new value, this option will give you a text box where you can enter whatever value you like.
This is now the end of the wizard and you'll be given the option to save and either exit the wizard, or Process another device, starting the wizard from the beginning. Make your choice by setting the toggle and click Save.
Last updated