Schedules
Introduction
Ardexa partners with Quantec to deliver advanced control solutions for customers in the renewable energy industry via the Clavis suite of plugins. These plugins allow scheduled control of Active Power and Power Factor setpoints by uploading schedule files to the Ardexa device. See https://clavis-plugins.gitlab.io/clavis-pv-control-docs/1.4/user-guide/config_setpoints/#schedule for more information.
To simplify management of these schedules, the Ardexa cloud includes a Schedules page. To access it, your workgroup will need the Schedules workgroup addon enabled. Contact your Ardexa Account Manager to discuss Quantec's Clavis control plugins and enabling this feature if it is of interest to you.
Prerequisites
The Schedules addon must have been enabled in your workgroup
One or more devices in the workgroup must have a compatible Clavis Control plugin installed. See Machine Plugins for more information
The user must have the Control Devices permission in the workgroup to be able to use most features in the Schedules page
Device Schedules page
Once enabled, the Device Schedules page can be found under the Control item on the main menu.
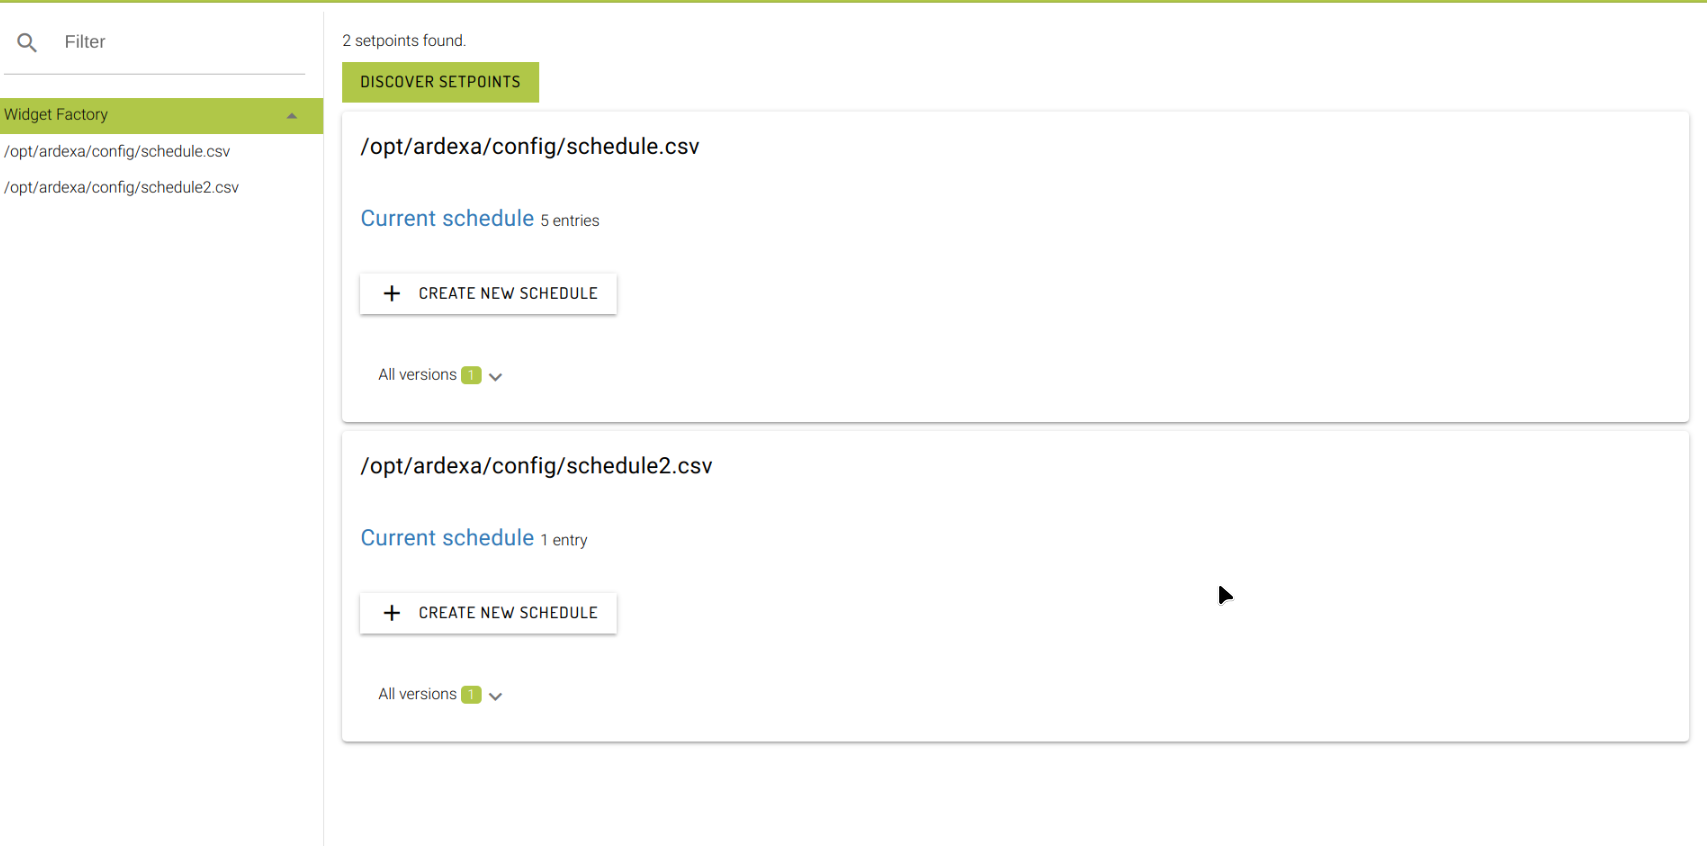
Click on a device to view currently known setpoint sources. If none are currently registered in the cloud, you can click Discover Setpoints to check the device for new setpoints.
Discover setpoints
Discover setpoints will check the current device for compatible Clavis Control plugins, and register them with the Ardexa Cloud. This enables them to be managed by the Schedules page.
As this requires live access to the device, discovery is only possible when the target device is online.
Device Summary
Once a discovery has completed successfully, a summary of the available setpoints on the device will be displayed:
If a pre-existing schedule file was found, it will be displayed as the "Current Schedule" for the setpoint.
The Ardexa Cloud tracks all versions of a schedule that have been applied once the Schedules workgroup addon is enabled in the workgroup. Schedules can have one of the following statuses:
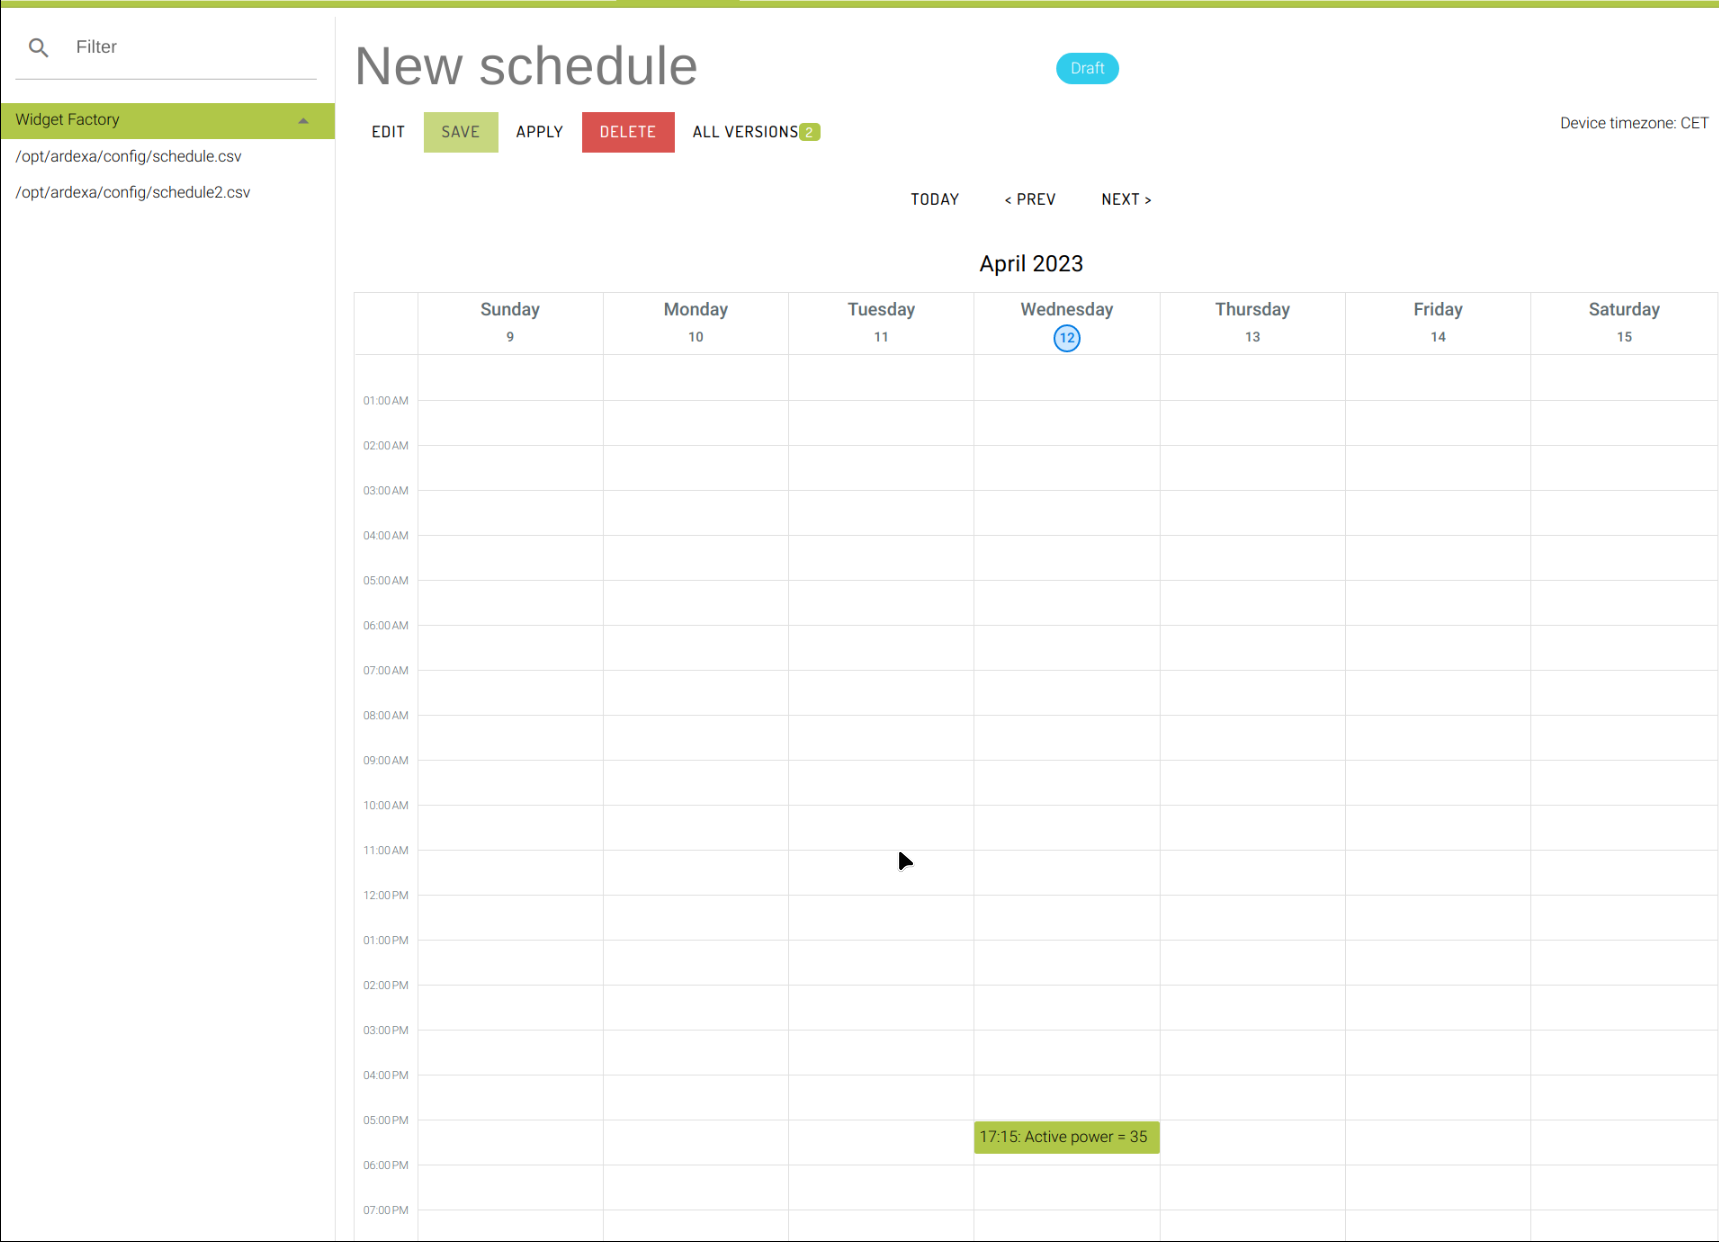
Draft: the schedule has been saved in the Ardexa Cloud via the Schedules page. It has not been sent to the device.
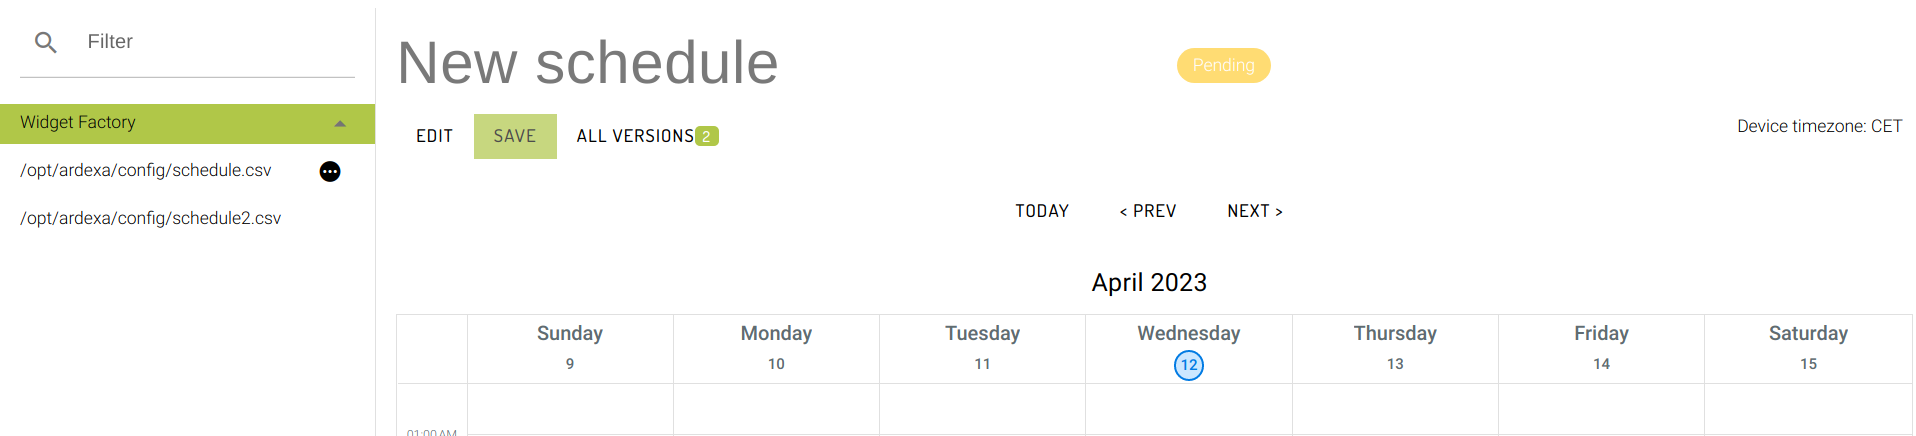
Pending: the schedule has been sent to the device by the Ardexa Cloud by a user on the Schedules page. The Ardexa Cloud has not received confirmation that the schedule has been applied by the Clavis Control plugin.
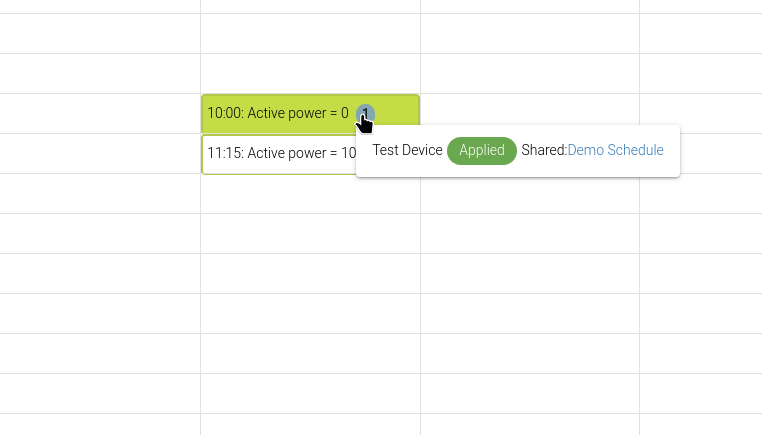
Applied: the schedule has been applied successfully by the Clavis Control plugin
Creating a schedule
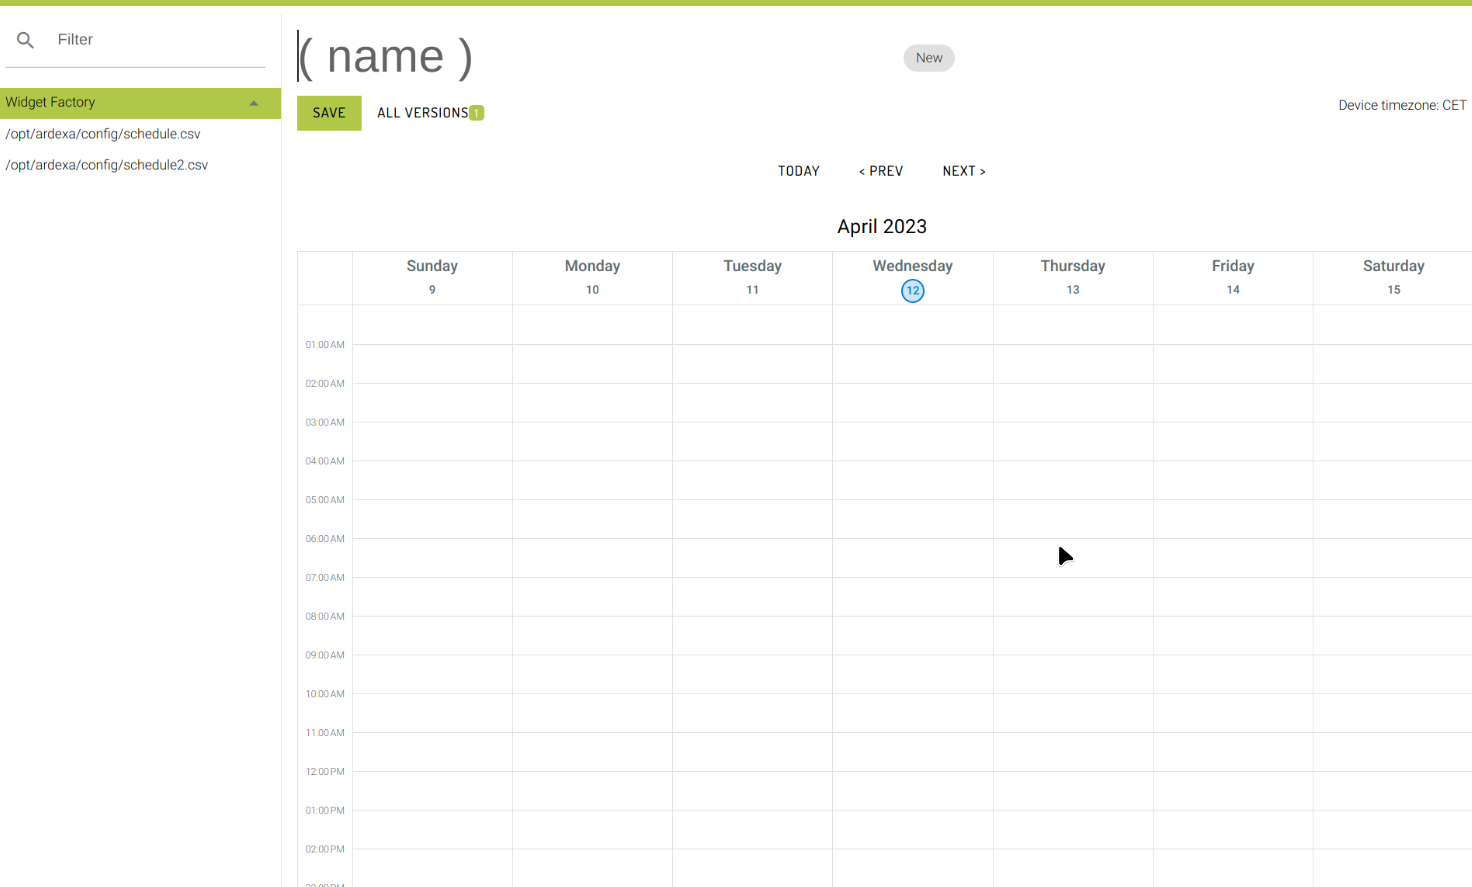
To create a schedule, click the Create new schedule button on the relevant setpoint.
Add a new name to distinguish this version from other schedules that have been defined on the setpoint.
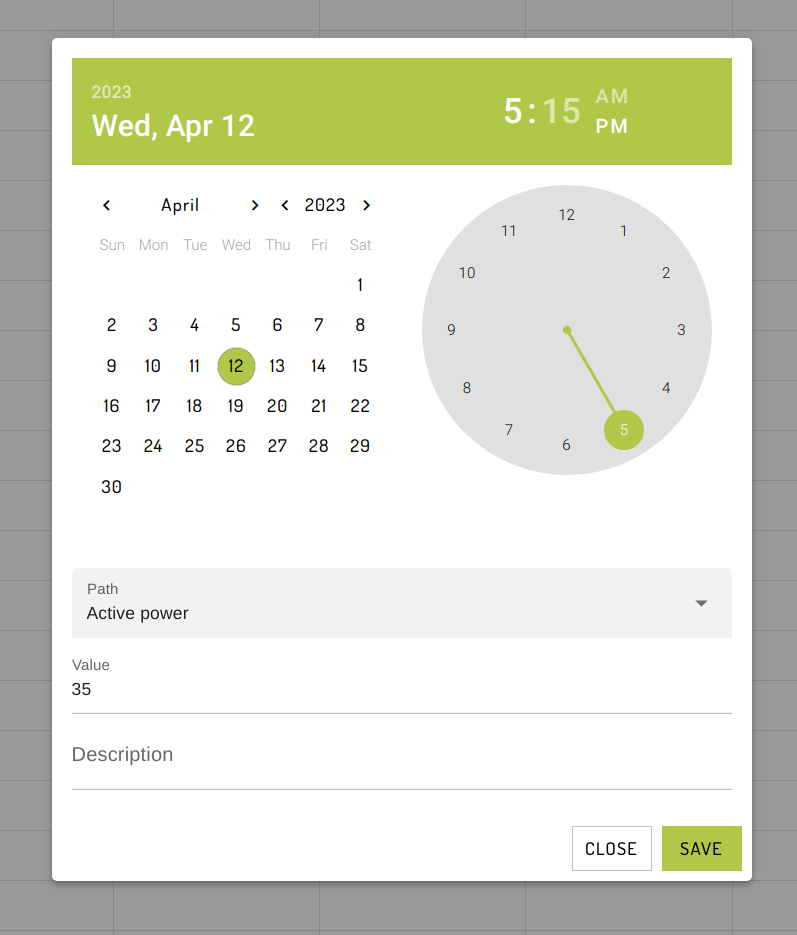
To add an entry to the schedule, click in the calendar, and fill out the schedule entry:
All times use the local time zone defined on the Ardexa device.
Next, choose a Path. Active power and Cos phi (Power factor) are currently supported.
Valid values are determined by the Path:
Active power supports numeric values from 0-100, which will be interpreted as percentages (%)
Cos phi supports unit-less decimal values between 0 and 1, eg.
0.5
Description is optional. Click Save to create the schedule entry.
Once you have defined all the necessary schedule entries, click Save to save the schedule as a Draft.
Once it has been saved, you can click Apply to apply the schedule to the device. This will convert the schedule into a file in CSV or JSON format (depending on the format the setpoint expects) and transfer it to the device.
If the device is offline, the file will be received by the device once it re-connects to the Ardexa Cloud.
After the device receives the schedule file, the Clavis Control plugin will process it, and notify the Ardexa Cloud. When the Cloud receives this notification, the schedule will be marked as "Applied".
Editing Schedules
Draft Schedules can be edited freely at any time. Schedule versions that are either Pending or Applied can no longer be edited directly, as they have been sent to a device. Clicking Edit on one of these schedules will result in a new, draft version of the Schedule being created, which you can edit.
Deleting Schedules
Similar to editing, draft versions of Schedules can be deleted by clicking the Delete button. Pending or Applied versions of schedules can not be deleted.
Un-managed schedule updates
Schedules that have been manually transferred to the Ardexa device using the File Transfer function of the Ardexa Cloud, the local file system or any other means will be picked up by the Ardexa Cloud once the Clavis Control plugin applies the schedule, or a user uses "Discover Setpoints" on the device.
Shared Schedules
Once one or more Device Setpoints have been discovered on your devices, you can use the Shared Schedules page to manage schedules on multiple devices in your workgroup.
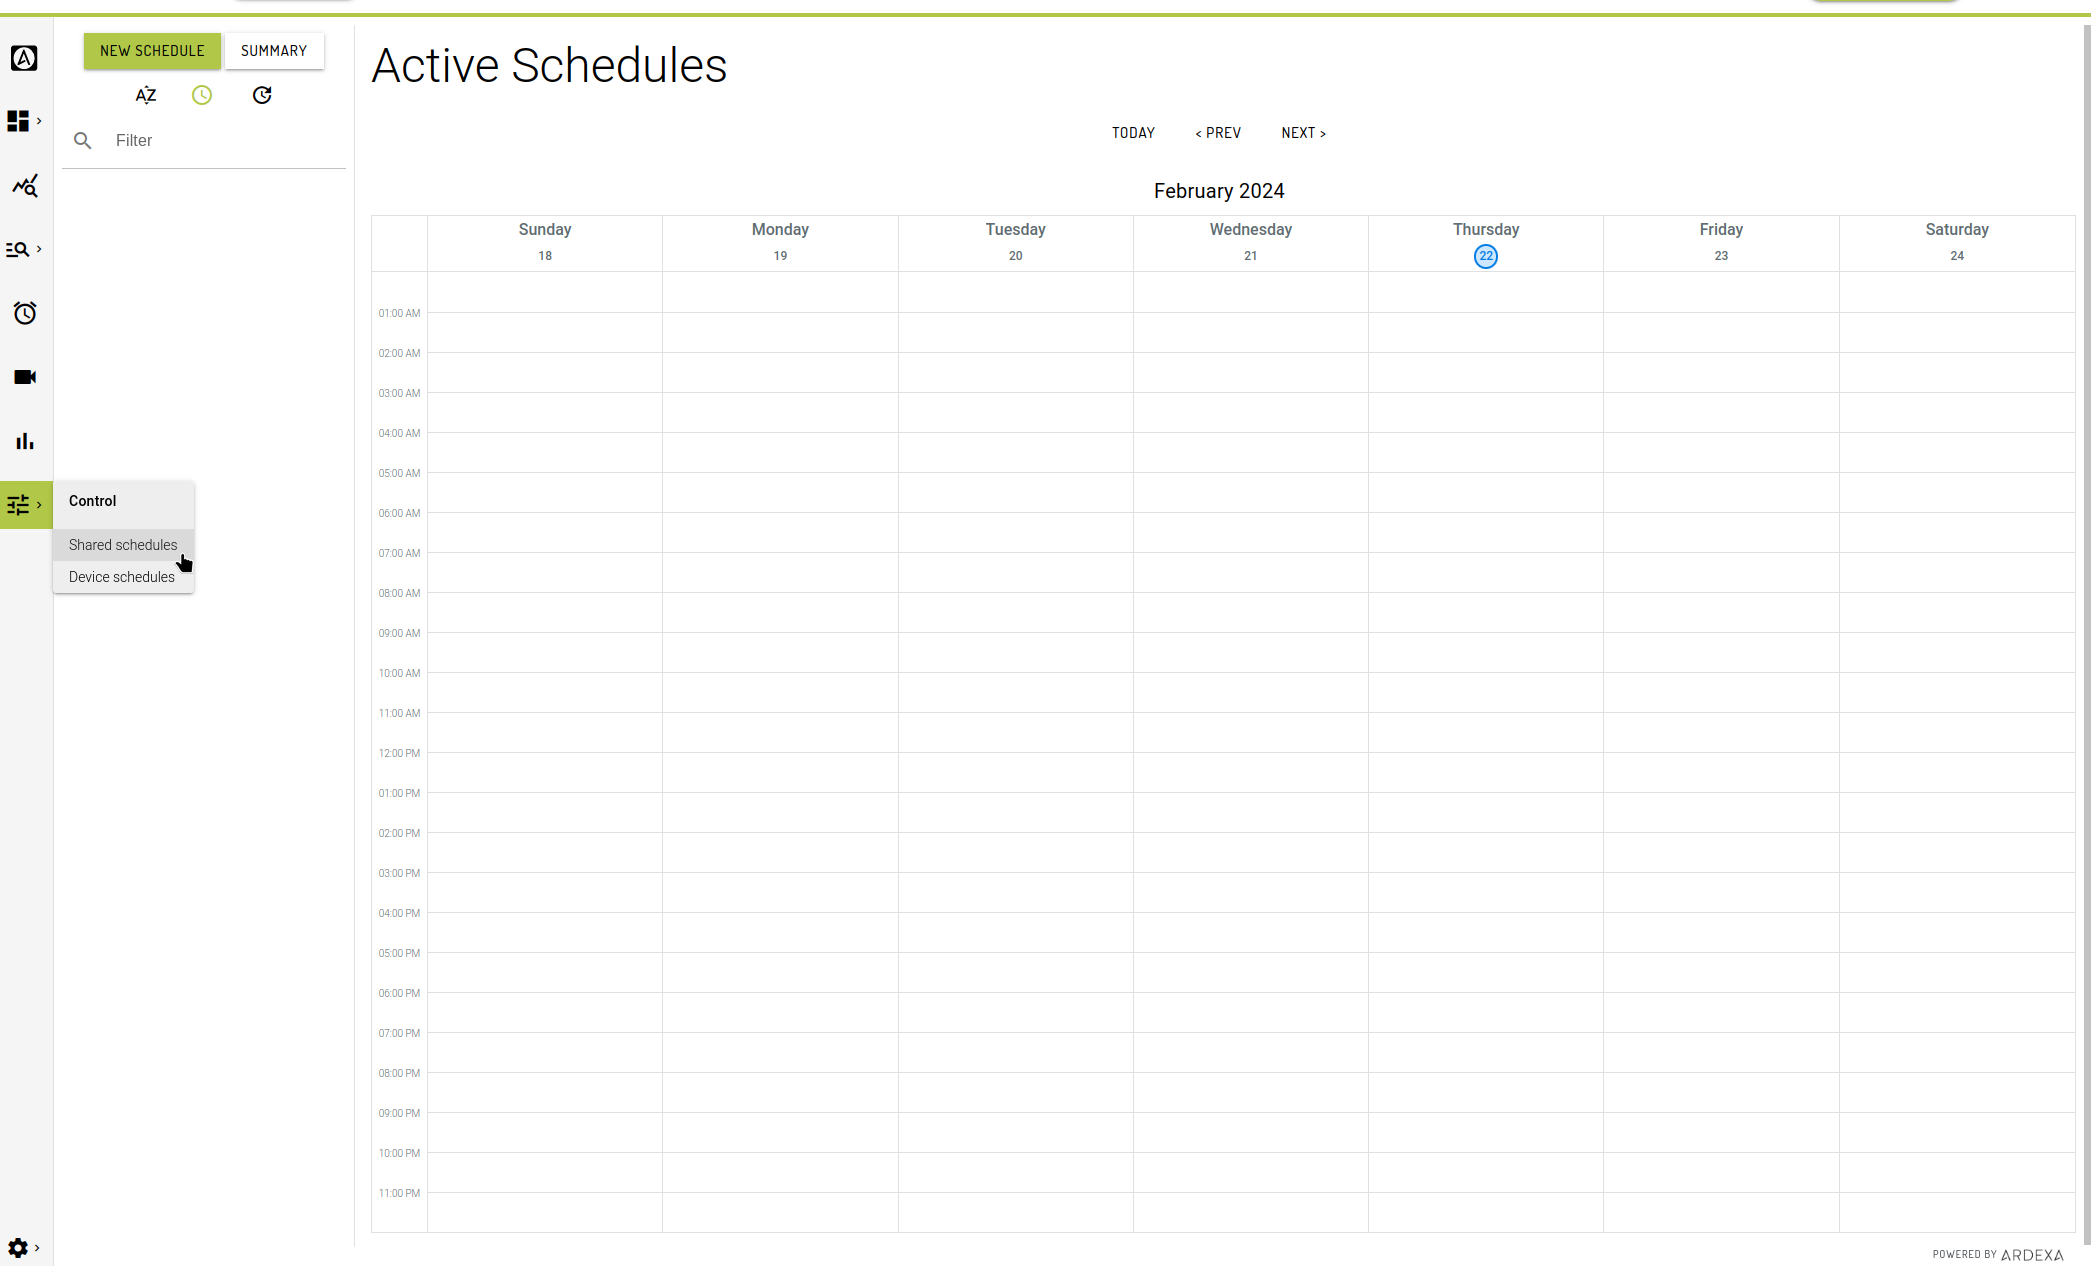
Active Schedules
This view provides a summary of all active schedule entries in the workgroup. Click on an entry to see which device(s) and schedule(s) are relevant.
To return to this view, click on the 'Summary' button.
Managing Shared Schedules
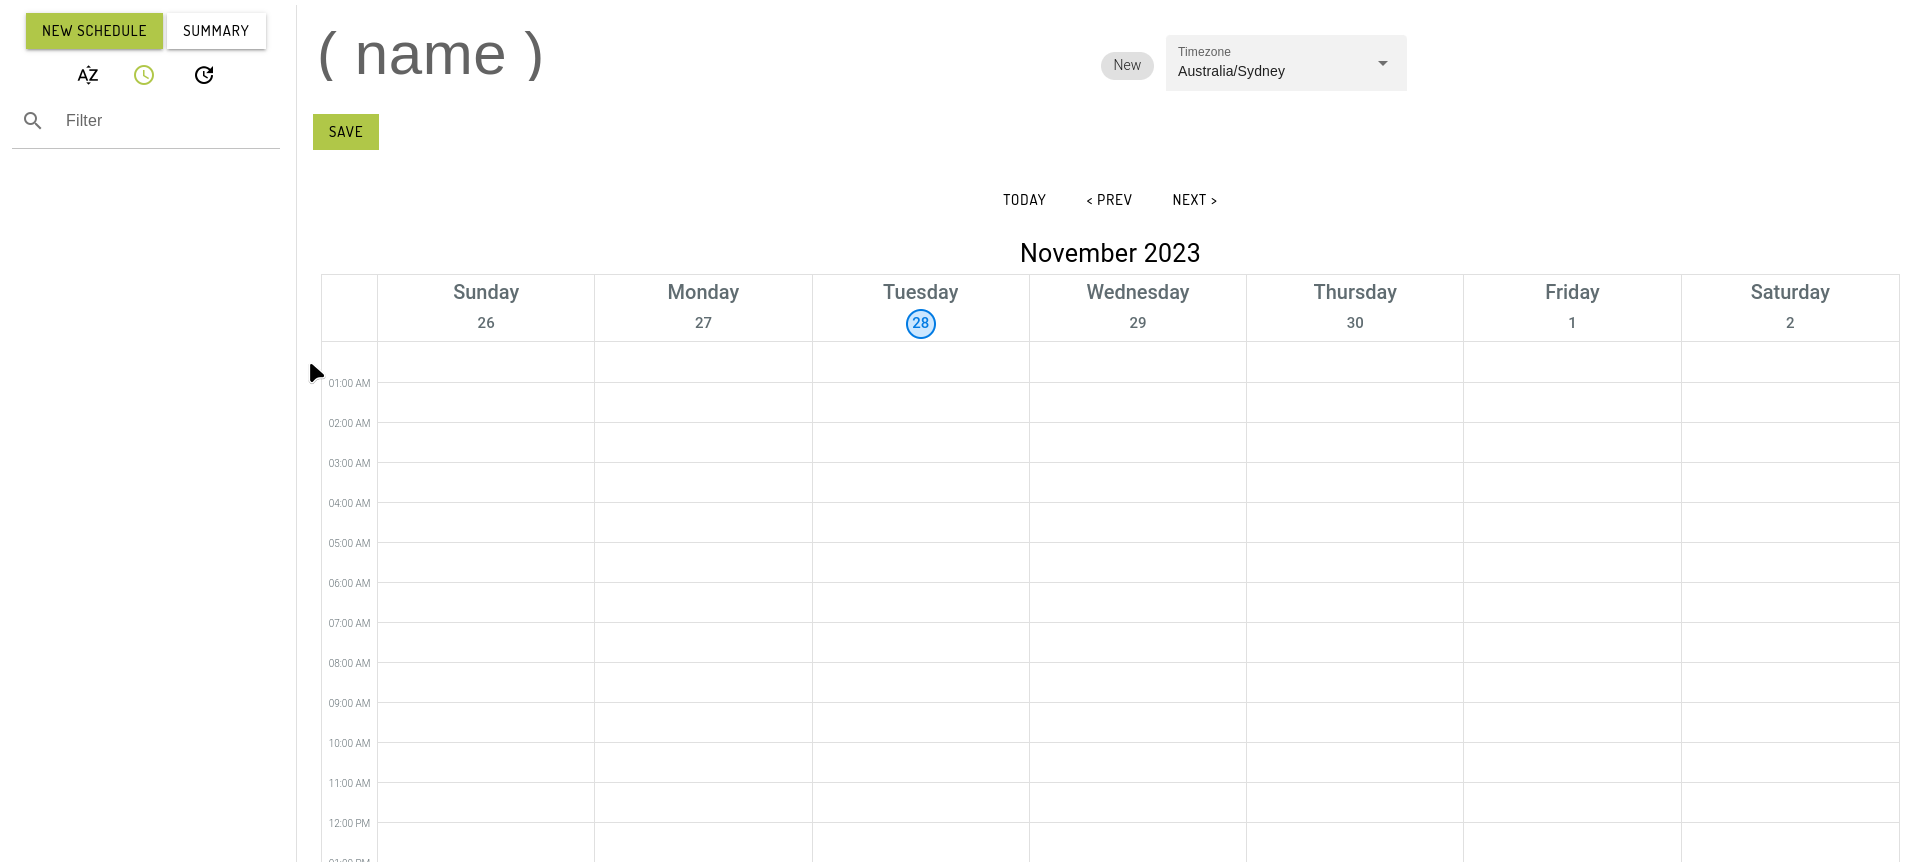
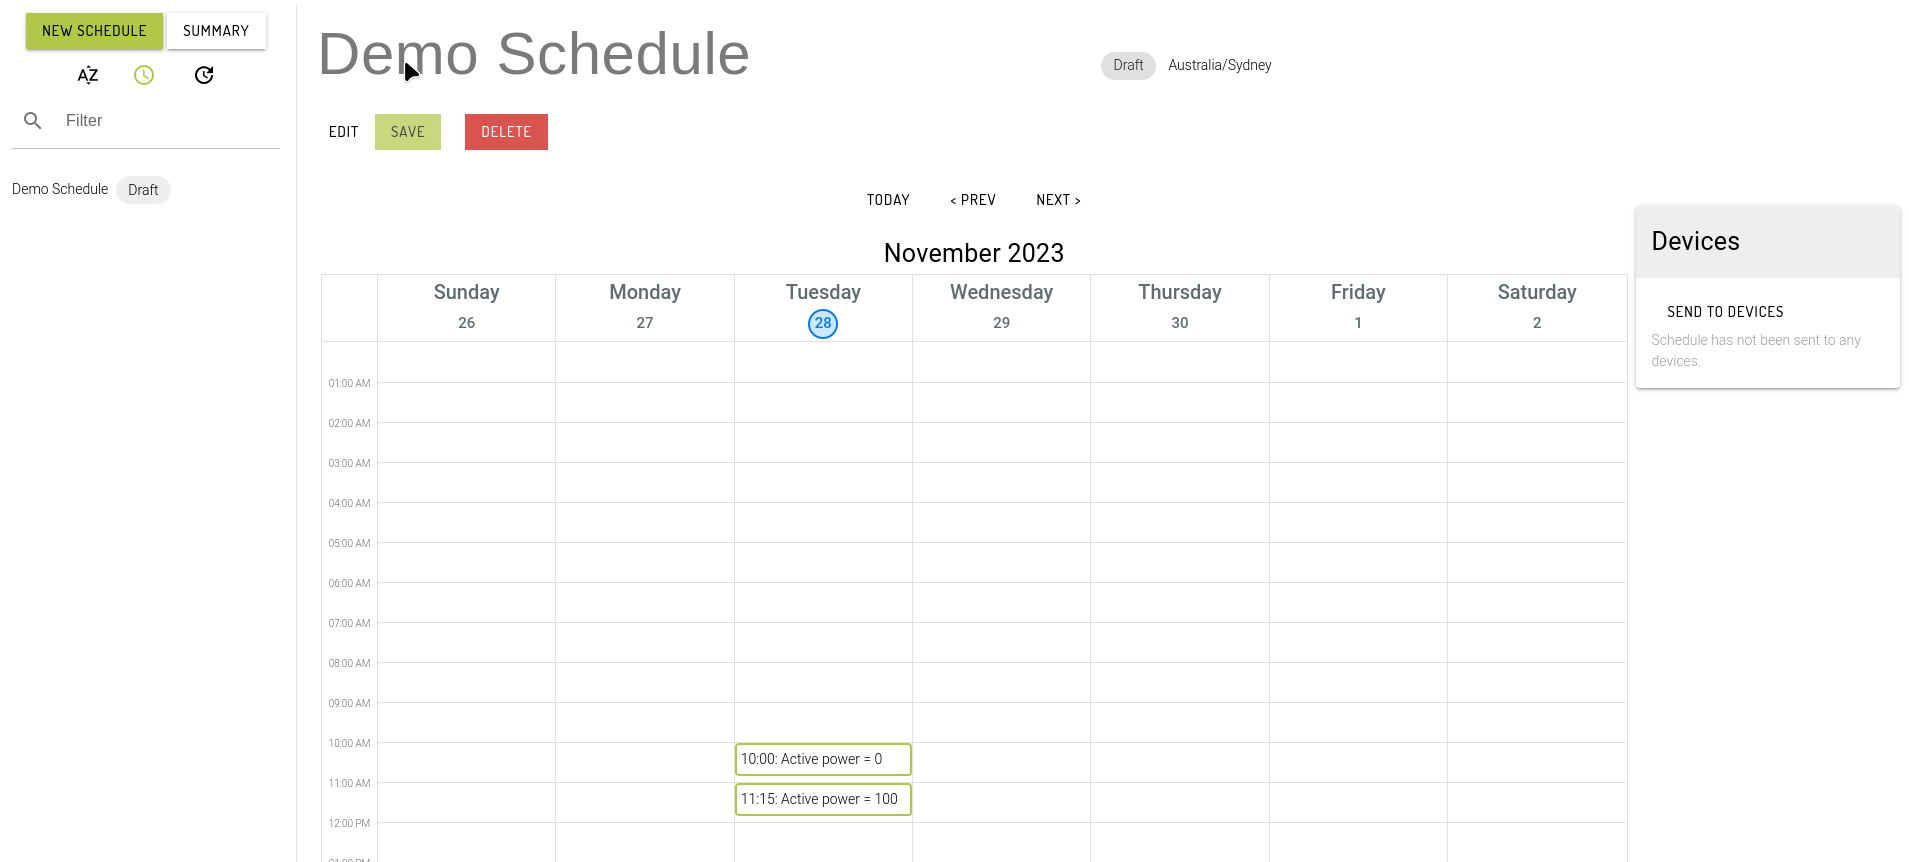
To create a new Shared Schedule, click the New Schedule button.
To save the schedule, you must enter a unique name, plus one or more entries. The schedule will initially use your local timezone, but this can be changed. It is generally recommended to use the same timezone as the devices that the schedule will control. Changing the timezone will maintain the local time on each schedule entry - eg. 10am November 28, Australia/Sydney time will become 10am November 28 Europe/Berlin time.
Once the schedule has been saved, it will go into 'Draft' status. More options will become available in the interface:
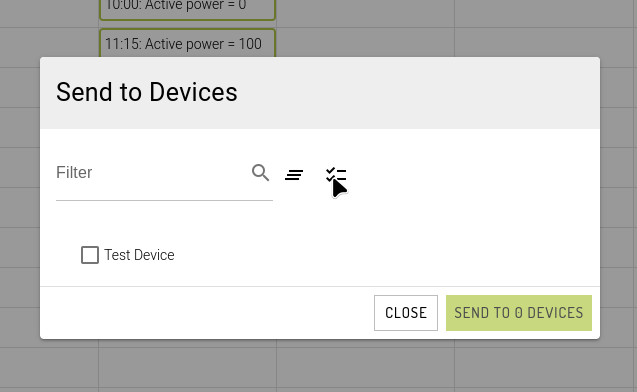
Draft schedules can be edited freely, or deleted entirely. Once the schedule is finalised, it can be sent to one or more devices via the Send To Devices button:
This dialog will display a list of devices/setpoints that have not already received this schedule. Select one or more and click the Send button to send the schedule to the selected devices. This will create an individual Device Schedule on each selected device, which can be viewed on the Device Schedules page.
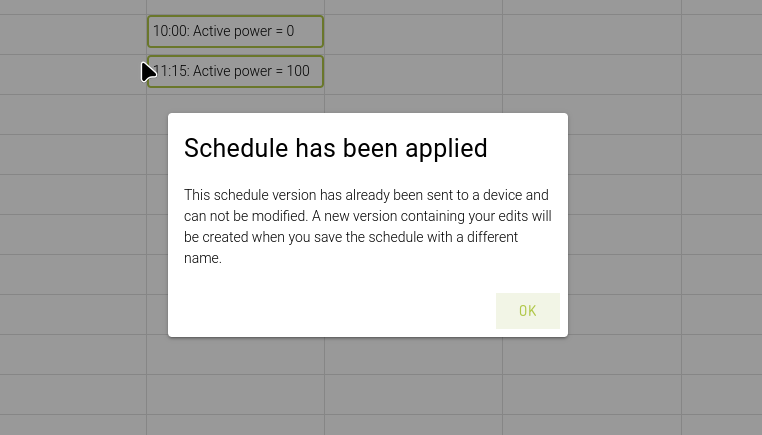
Editing Shared Schedules
Once a shared schedule has been sent to one or more devices, it can no longer be changed. It can be sent to more devices via the Send to Devices button, though. Clicking the Edit button will allow you to create a new schedule based on the current one, with a new name.
Viewing Shared Schedules
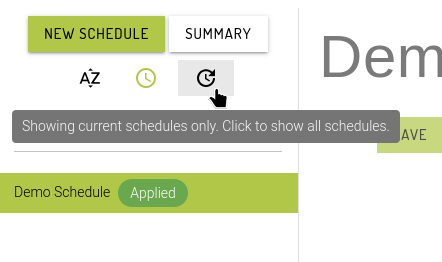
By default, the Shared Schedules page will show schedules that either:
were created in the last week
have at least one entry from the last week, or at some point in the future
The most recently updated schedules will be displayed first. Alphabetical order is also supported.
To view all shared schedules, click on the history button:
Last updated