Users and Permissions
Controlling what users can see and do in the Ardexa Web App
Workgroup Users and Permissions
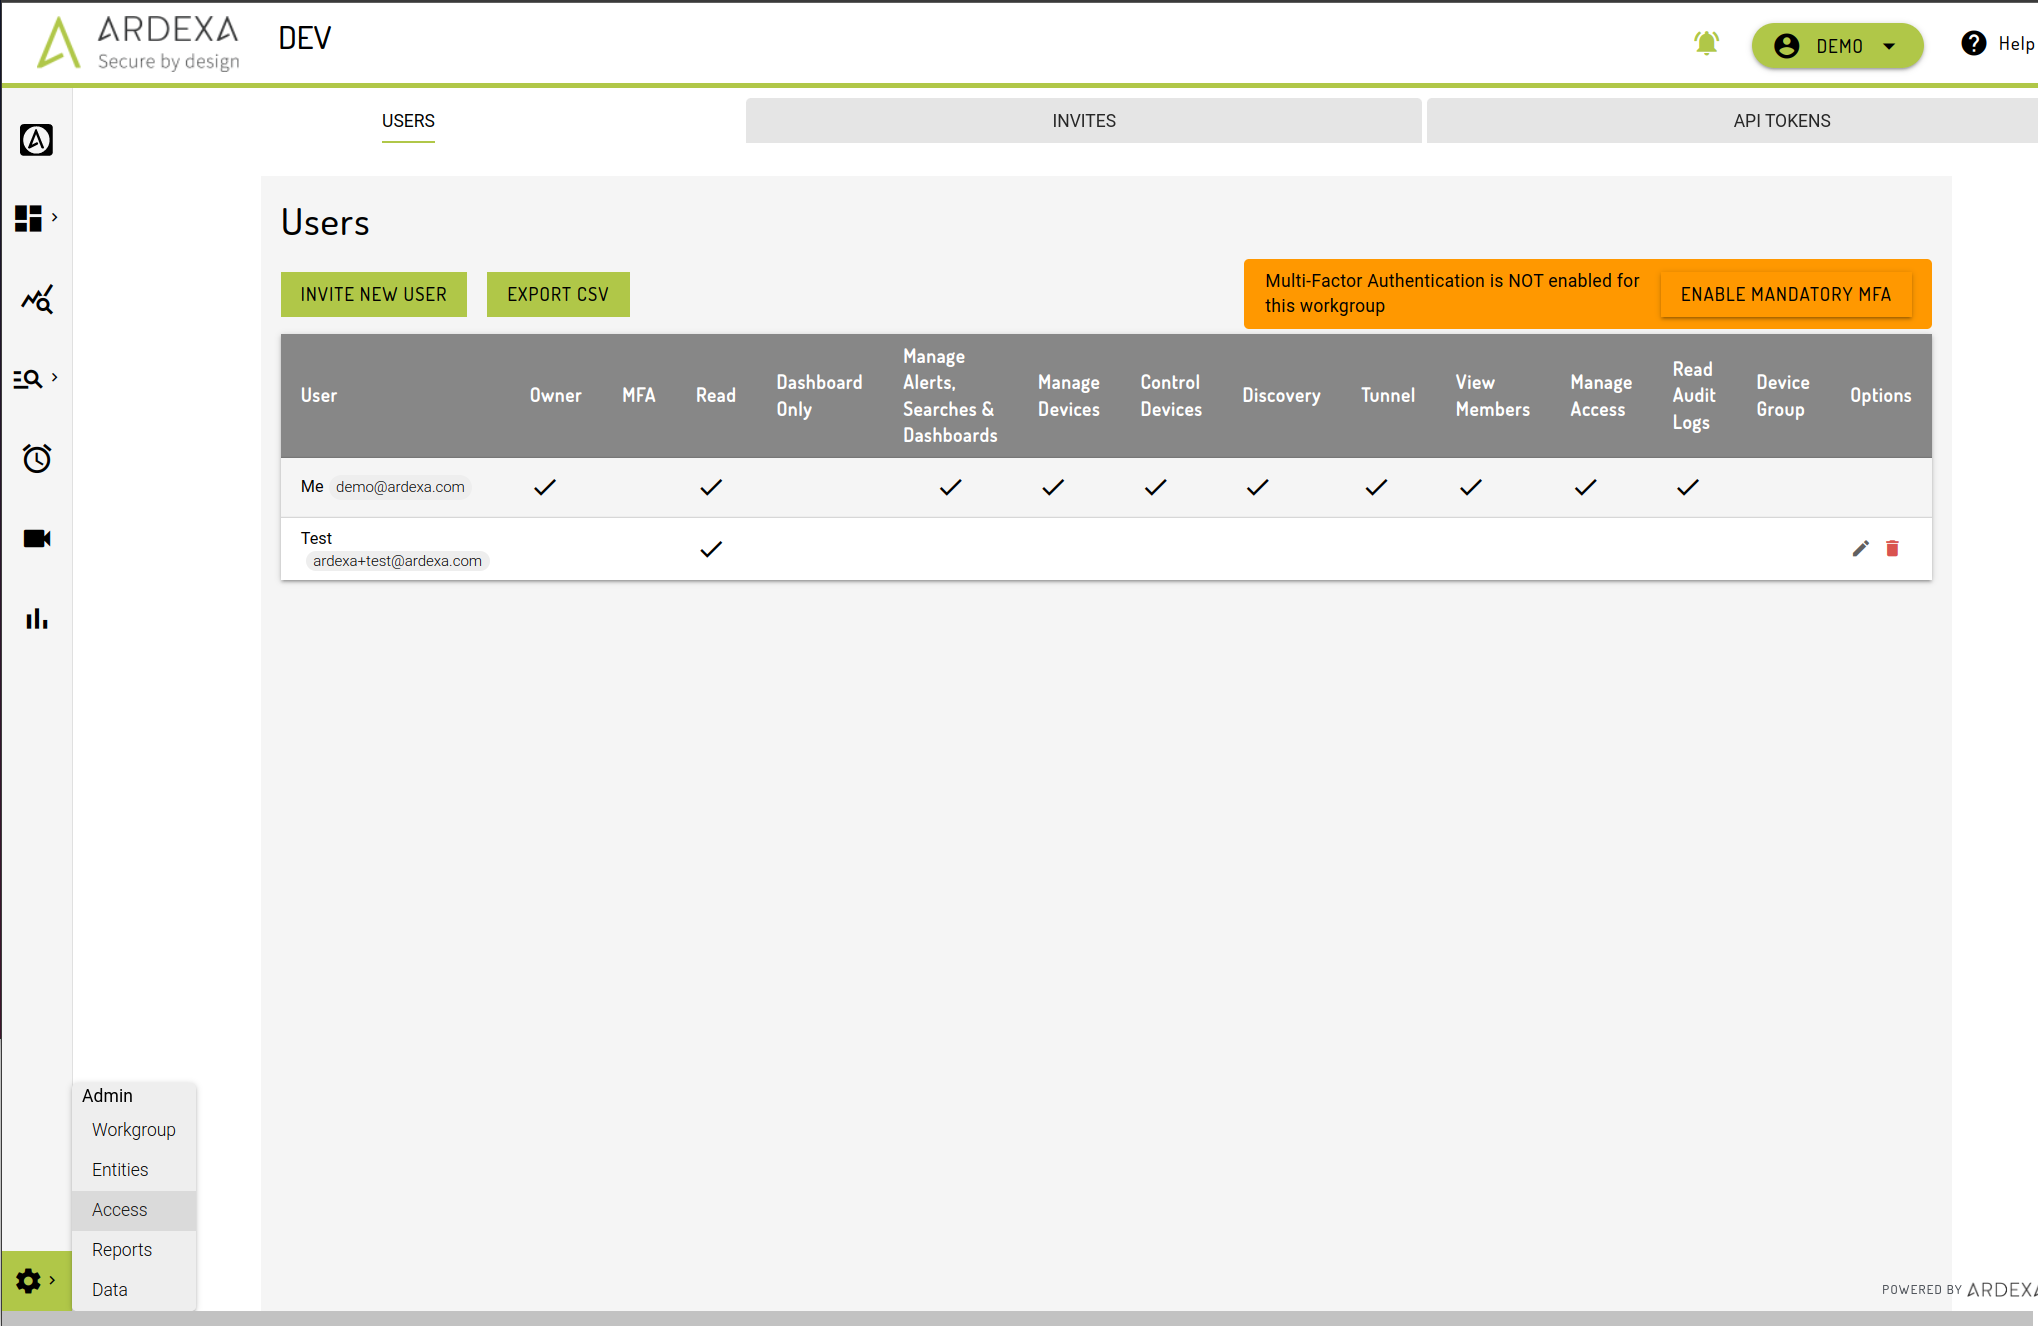
Access to data stored in the Ardexa's Cloud API can be controlled via User Permissions. This can be managed via the menu: Admin -> Access -> Users tab
Ardexa users and API tokens can be granted one or more permissions to dictate what functionality they can access on the Ardexa Cloud.
Setting Permissions
Permissions are set when you [INVITE A NEW USER]
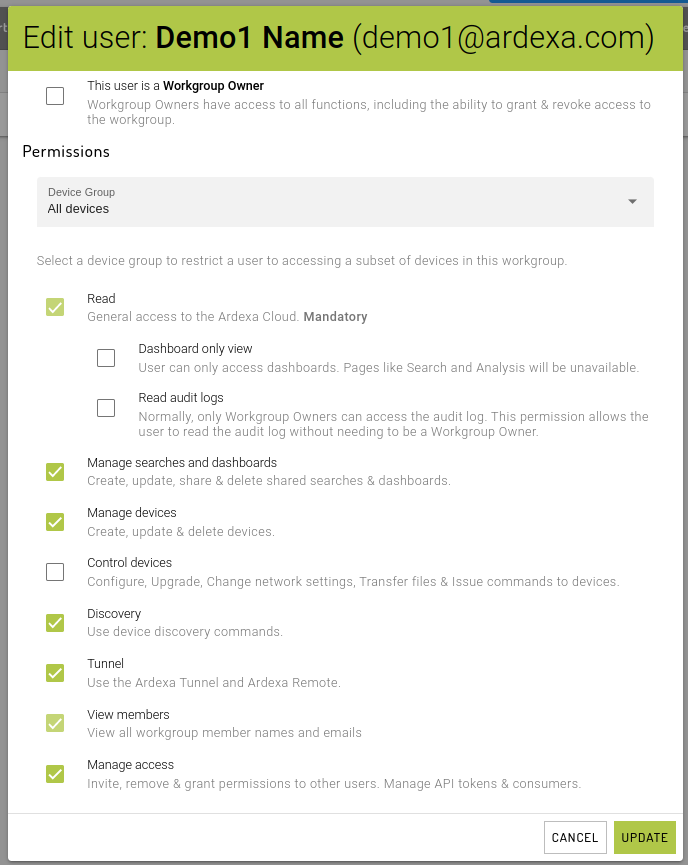
Or alternatively you edit an existing user via the [OPTIONS] column at the end of the user's record.
Available Permissions
Permission Types Explained:
User Type / Permission | Actions & Visibility Provided |
Workgroup Owner | A
|
Device Group | A user can be a member of one-or-none Device Groups. A Device Group has to be first defined before it can be selected in this list. Define your Device Group following the article Device Groups. Users with a Device Group restriction are blocked from the following actions, regardless of their other permissions:
|
Read | This is the basic access to the Ardexa cloud. This grants the user read-only access to devices, searches & dashboards. This permission is mandatory. If a user does not need this permission, they should not be given access to the Ardexa cloud. |
Manage Searches and Dashboards | This permission allows a user to apply the following actions for saved searches and dashboards created by any user in the workgroup:
|
Manage devices | Devices are edge devices that run an Ardexa Agent. These are listed in the This permission allows a user to apply the following actions against a device in the current workgroup:
|
Control devices | Each device in the
then to each of the device's following menu tabs:
Be careful with this permission. It is a very powerful and should only be given to users who require this access AND know how to control an edge device. |
Discovery | The section This permission allows a user to run these commands without the need to grant them access to the remote shell. |
Tunnel | The Ardexa Tunnel allows secure VPN-like access to a remote machine on the edge device network. It is like a secured, audited VPN. This permission allows a user to be given access to the Ardexa Tunnel. |
View members | By default, workgroup members cannot see other members of the workgroup. This permissions enables users to access the name and emails addresses of all other members. This permission is a read-only subset of This is particularly useful for setting up email alerts or viewing audit logs. |
Manage access | This permission allows a user to issue invites to the workgroup and remove & grant permissions to other users, manage API tokens & consumers. They do not need to be a Workgroup Owner. |
Read audit logs | Grant the ability to read the restricted |
Adding new Members to Workgroups
Invites
If new users need to be added the list, then an "invite" needs to be sent so they can access your workgroup. Invites can only be performed by Workgroup Owners or users with the Manage access permission.
To invite new users to a workgroup navigate to the menu item: Admin -> Access -> Invites tab
Click on Invite new user.
Note: To invite a new user, you only need their email address.
When invite emails are blocked:
There are rare cases where an invite email has been blocked completely. In which case you will need to add support@ardexa.com as a "Safe Sender" in your email client, or check your spam folder for the invite email.
If the User has an existing Ardexa account, the new permissions will be added to their existing account once they accept the invitation. If the User does not have an existing account, they will be asked to create one when they accept the invitation.
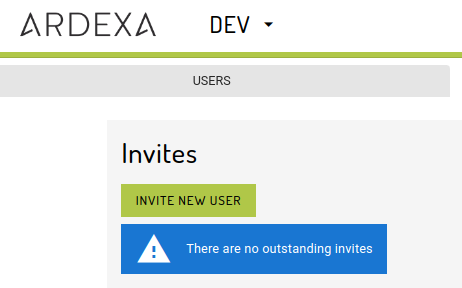
Outstanding / Inactioned Invites
To view your outstanding invites that have yet to be actioned by the invitee, navigate to: Admin -> Access -> Invites tab
You may also resend invites from this page where the original invite has been lost.
User sessions
When a user logs in, their browser receives an implicit token which is used to access the Ardexa Cloud for 10 hours. When this token expires, they will have to log in again.
Workgroup access and permissions are set in this token when the user logs in. Therefore, changes to a user's permissions will not take effect until the user logs in again. Keep this in mind when changing a user's permissions:
If you are increasing a user's permissions, they will need to log in again to utilise the new set of permissions
If you are reducing a user's set of permissions, or revoking their access to a workgroup entirely, they may retain their current level of access to the system for up to 10 hours
Mandatory Workgroup Multi-Factor Authentication (MFA)
Workgroup owners have the ability to mandate all users in the workgroup enable MFA on their accounts.
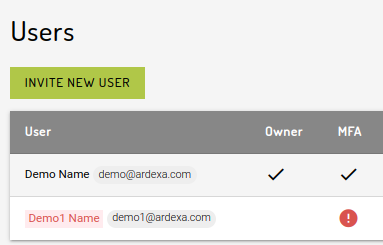
ADMIN > USERS
The USERS view will now report the status of MFA for the workgroup. Where MFA is not enabled workgroup-wide the following banner will appear:
To set mandatory MFA for all workgroup users simply click on the [ENABLE MANDATORY MFA] button. Confirming the dialog will:
Force all workgroup users to set up MFA on their next login.
Send an email advising of the new requirement to each user.
WARNING:
Setting MFA on a workgroup is not easily reversible.
When MFA is enabled for a user it will apply to all their workgroups.
Why? Because MFA applies at user's login, not when they move within workgroups once they are logged into the application.
Once MFA is enabled the banner will report the status as follows:
NB: Once workgroup mandatory MFA is enabled:
A user cannot disable MFA for their account.
They can continue to reset their MFA by going through the standard
[DISABLE]steps within their profile page, which is a necessary requirement. However, at their next login they will be presented with the same step-through wizard to set up MFA.
Set Up MFA (2FA)
Setting up MFA for an individual is the same process as described in the article here.
MFA flag
Once the user has setup their MFA, the column will display a check mark to indicate that MFA is enabled whether or not the MFA is mandatory in the current workgroup. Otherwise, user's name will be displayed in red font with a danger warning icon in the MFA column for workgroups that has the MFA required.
The pre-requisites are:
A smart phone at hand
Either the Google Authenticator or Microsoft Authenticator installed on the smart phone.
Last updated